
Brand Message send types
Brand Message is divided into types by who receives it. For a normal send, pick one of M, N, O, or I under Recipient targeting; to reach every channel friend, use the broadcast send (type F).
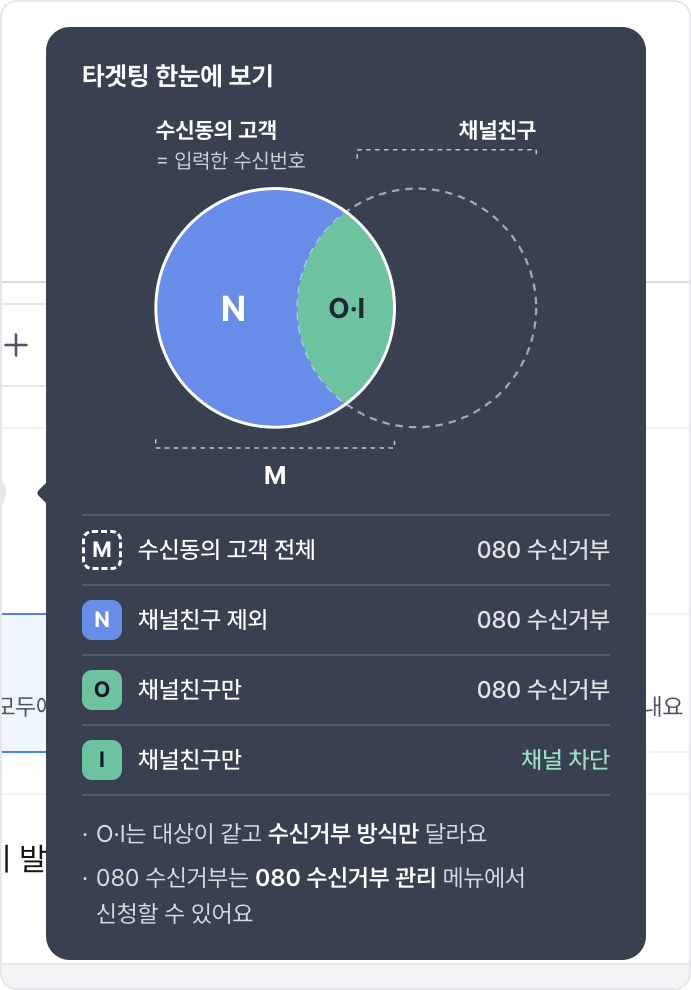
| Type | Recipients | Opt-out method | Send target expansion |
|---|---|---|---|
| All (M) | Every consenting customer among the numbers you enter, channel friends included | 080 opt-out | Required |
| Excluding friends (N) | Consenting customers who are not channel friends | 080 opt-out | Required |
| Friends only (O) | Consenting customers who are channel friends | 080 opt-out | Not required |
| Friends only (I) | Consenting customers who are channel friends | Channel block | Not required |
| Broadcast (F) | Every channel friend (no recipient numbers) | — | Not required |
O and I reach the same people and differ only in the opt-out method
Using the 080 opt-out (O) requires a registered 080 number. The channel block (I) works without one. The opt-out wording in the preview changes to match your choice.
M and N need send target expansion
To reach customers who are not channel friends, apply for send target expansion on each channel. Once approved, you can also reach customers who consented to KakaoTalk marketing on your own site or app. → Registering sender information
Broadcast send (type F)
This sends the same message to every channel friend. You do not add recipients, and it goes out by schedule only.
- Click Broadcast send type F on the Brand Message send screen.
- Choose the channel under Channel settings, pick a template with no variables under Load template, then click Done.
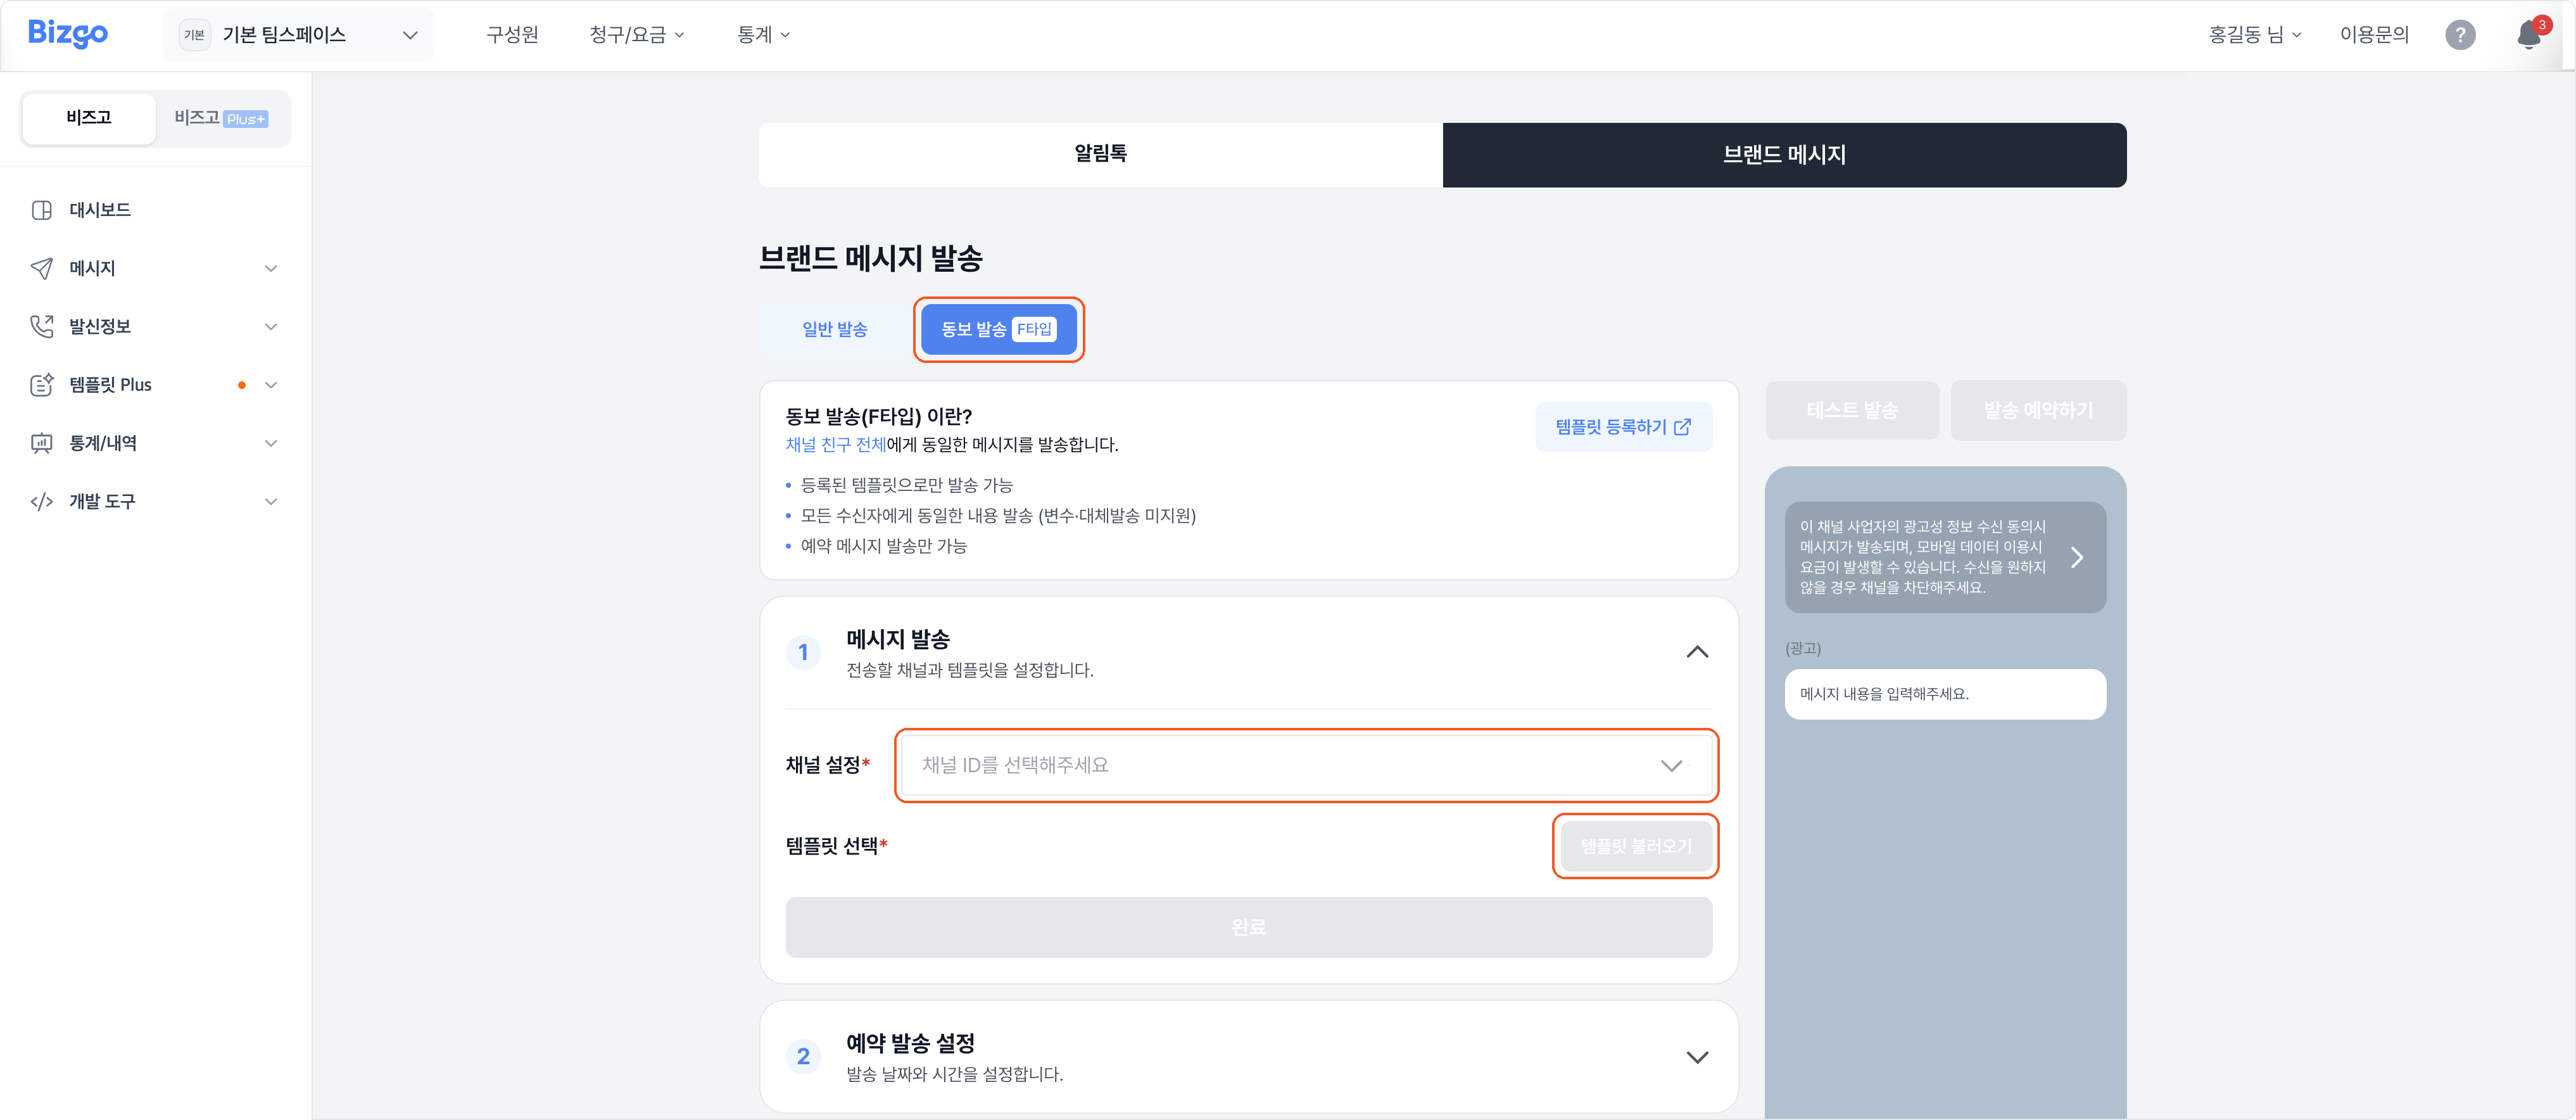
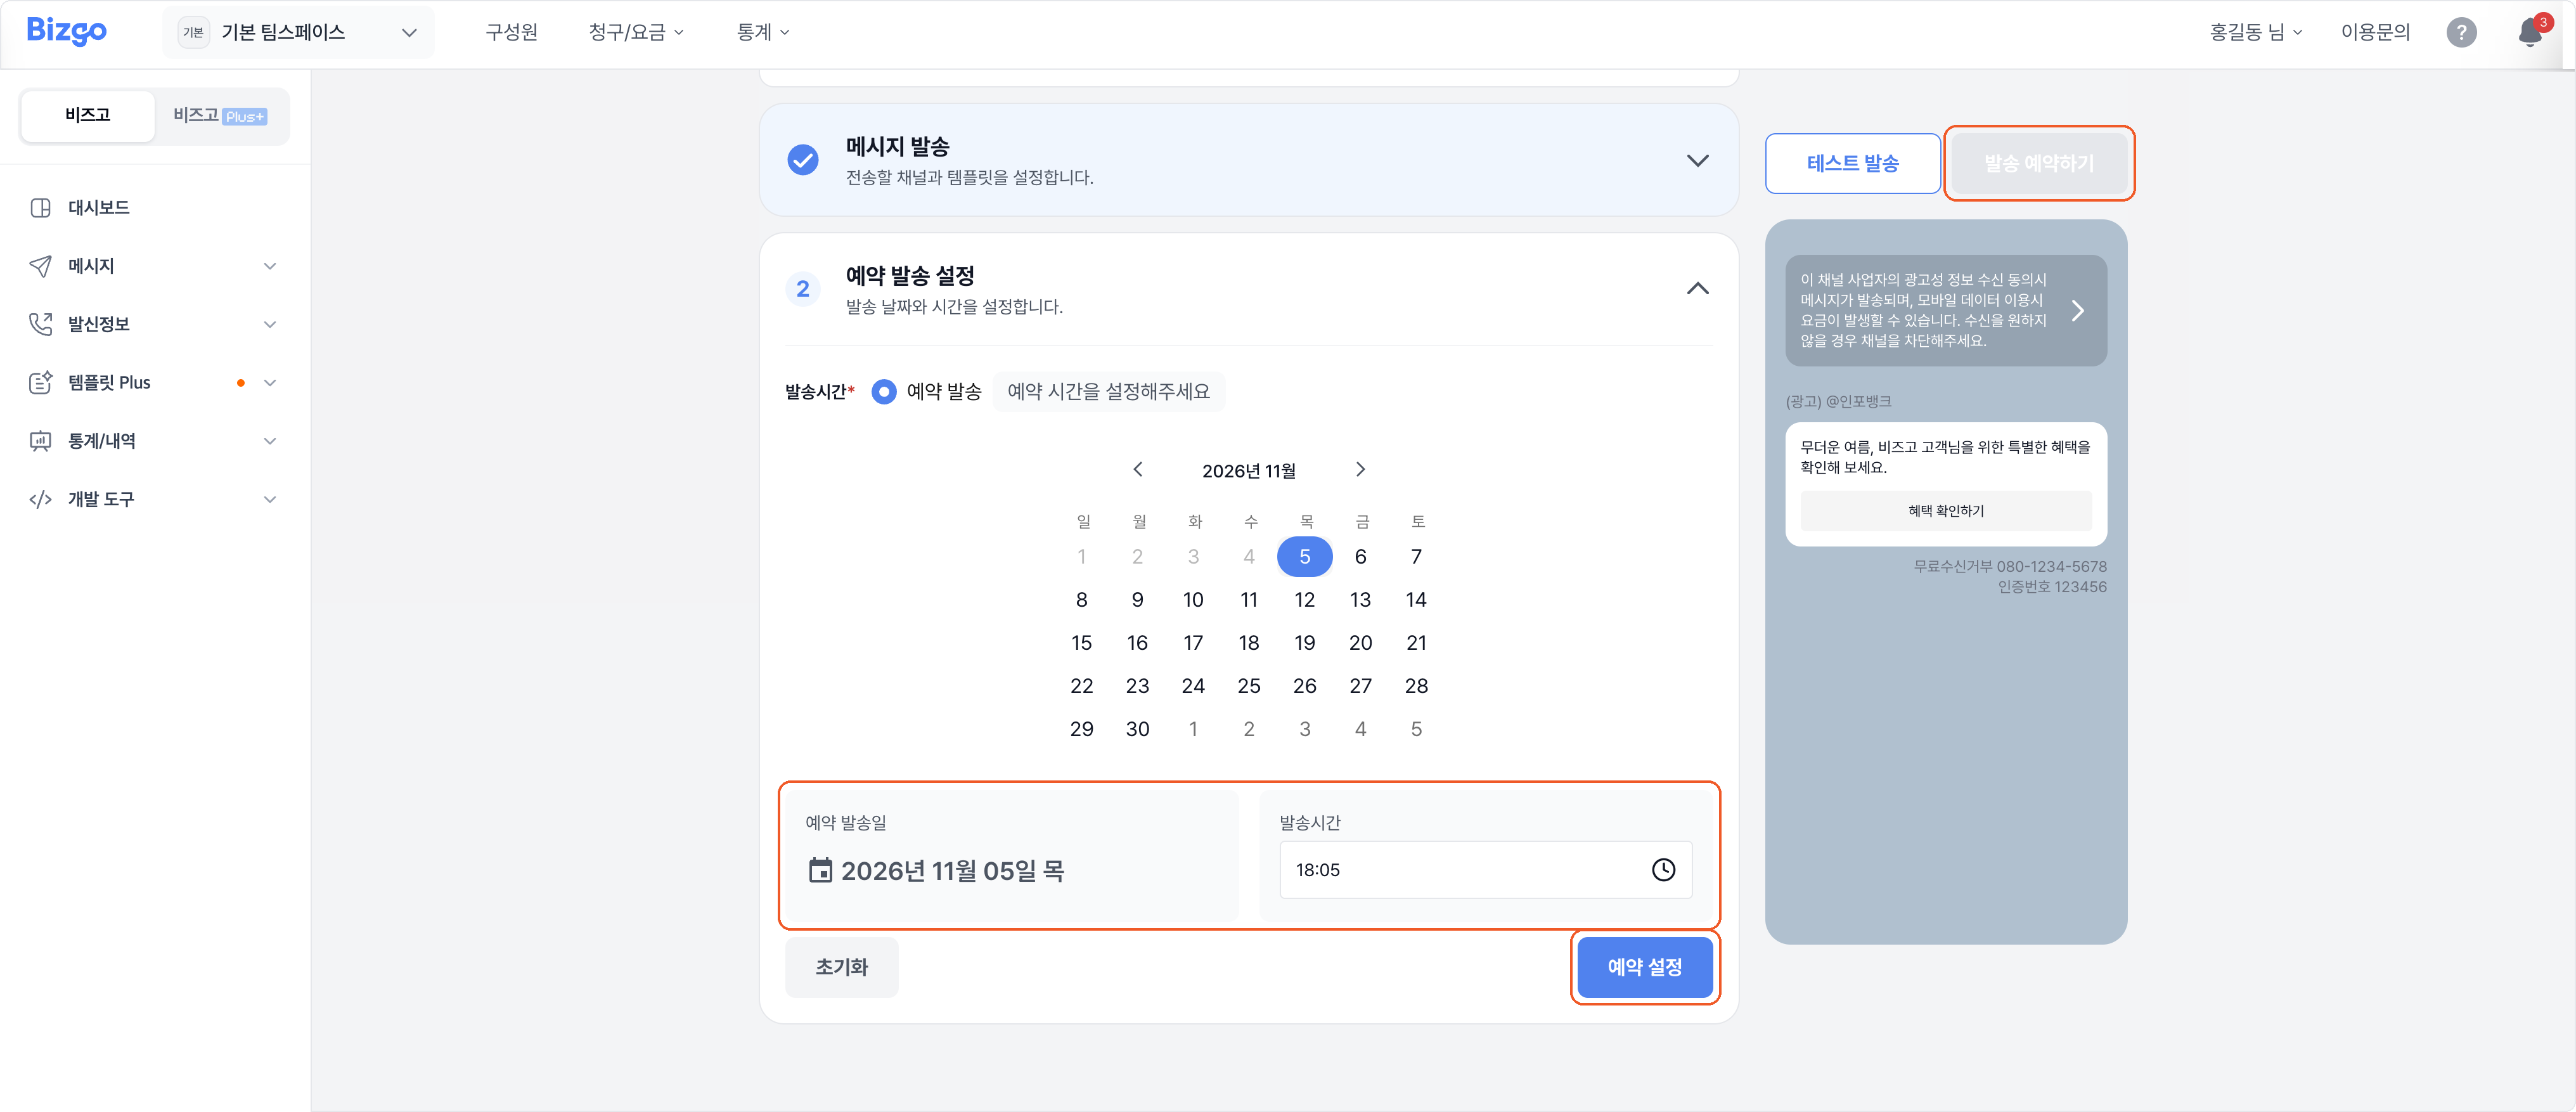
- Pick a date in the calendar, set the time, then click Set schedule.
- Click Schedule send at the top right and confirm the estimated volume and the scheduled time.
Type F constraints
- Only registered templates work, and templates with variables (
#{…}) cannot be used. - Everyone receives the same content, and failover is not supported.
- Immediate sending is not available — scheduling only. Pick a time from 15 minutes ahead up to 30 days out, between 08:00 and 20:50, in 5-minute steps.
- The time cannot be changed once scheduled. Cancel the schedule and register it again.
Once accepted, the schedule appears under Message box > Scheduled messages, where you can stop or cancel it before it goes out.
Next
- The full send flow → Send KakaoTalk
- Creating templates → Create a Brand Message template