
Manage recipients with the address book
Save recipients under Bizgo > Messages > Web send > Address book and pull them in with Import from address book when you send.
1. Create a group
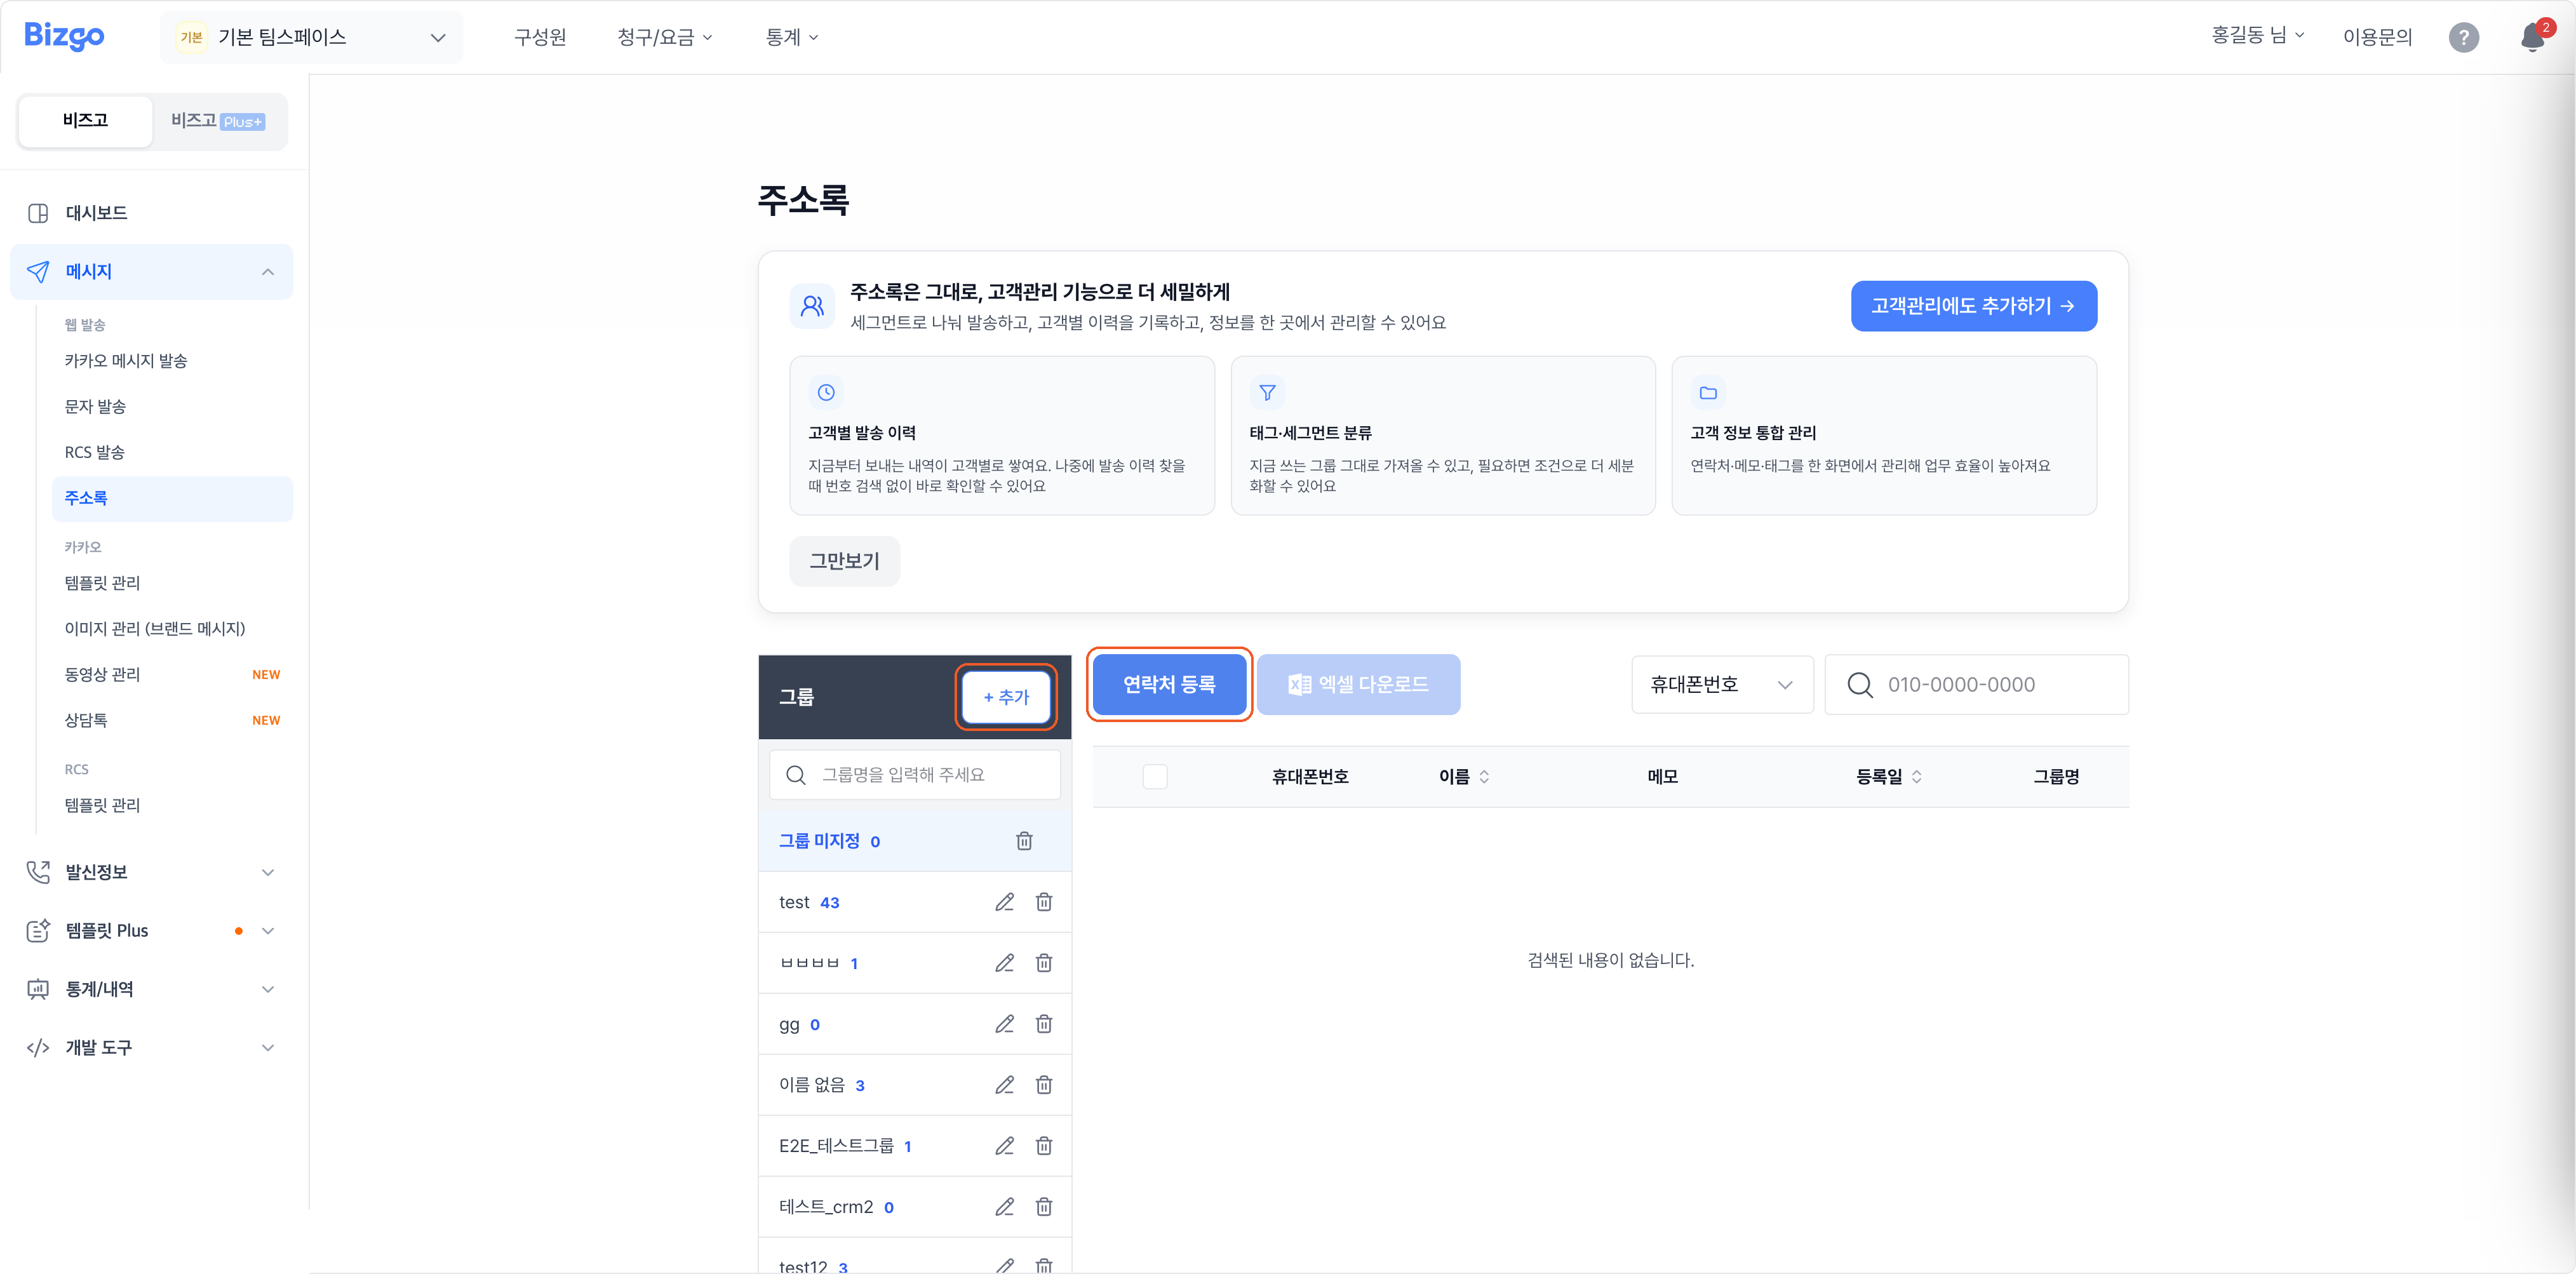
Click + Add in the group area on the left to create a group. The icons next to the group name rename or delete it, and contacts with no group collect under Ungrouped.
2. Add contacts
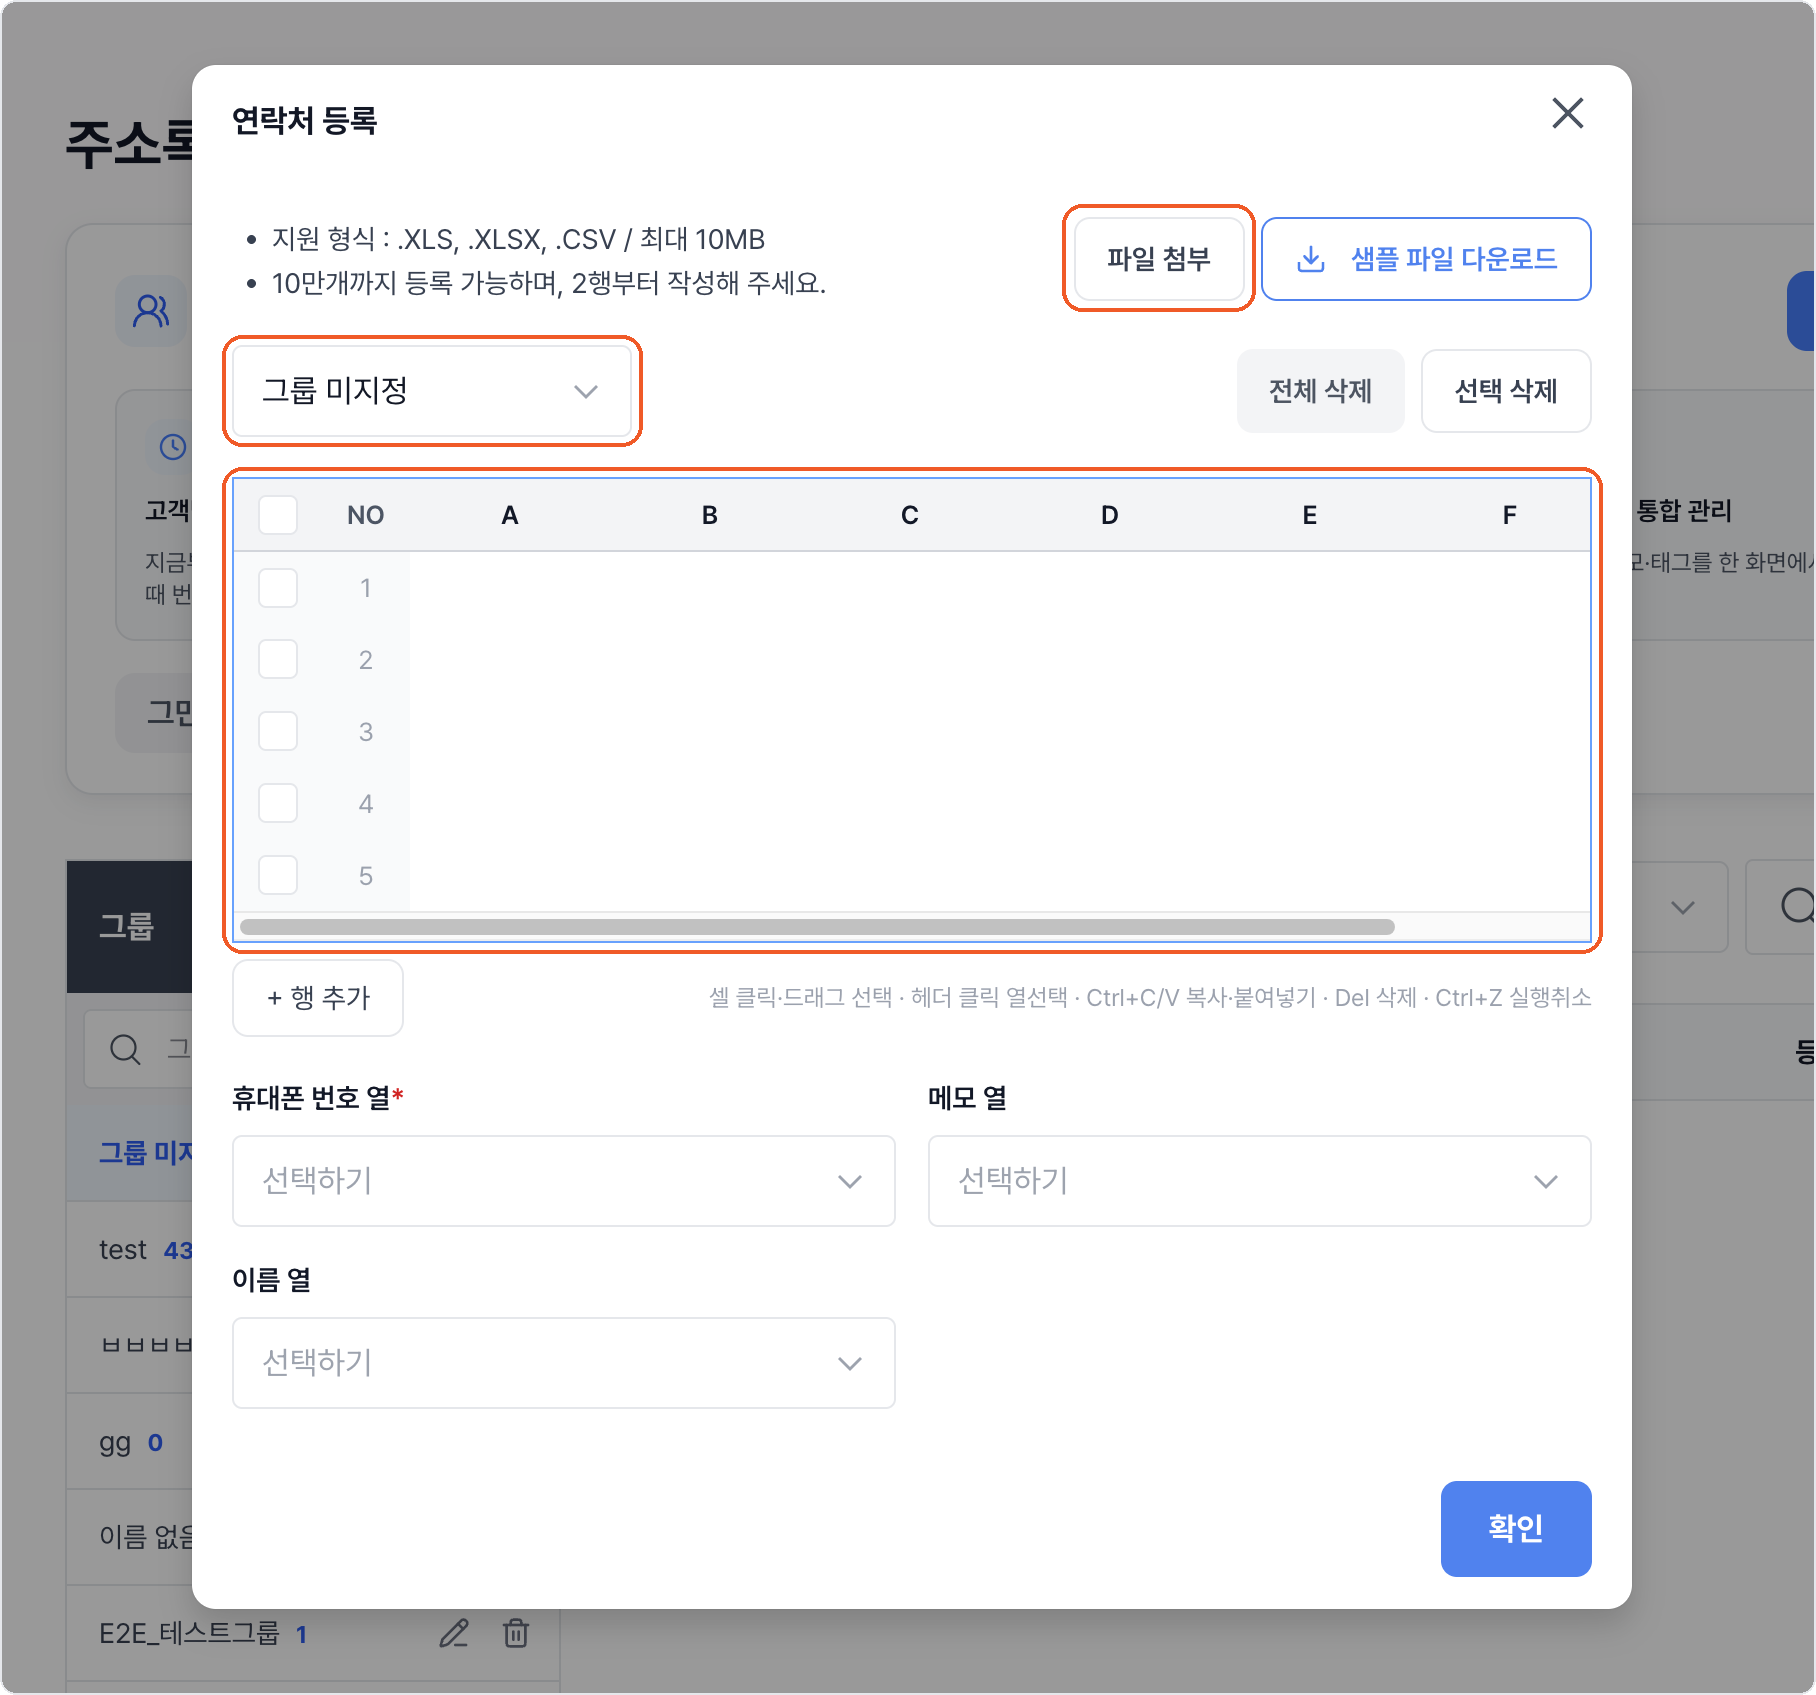
Click Register contacts and choose the group they belong to. Upload an Excel file with Attach file, or type or paste directly into the table.
Uploading a file
Check the format with Download sample file first. XLS, XLSX, and CSV up to 10MB are accepted, and up to 100,000 contacts register at once. Start your data on row 2.
3. Map the columns and register
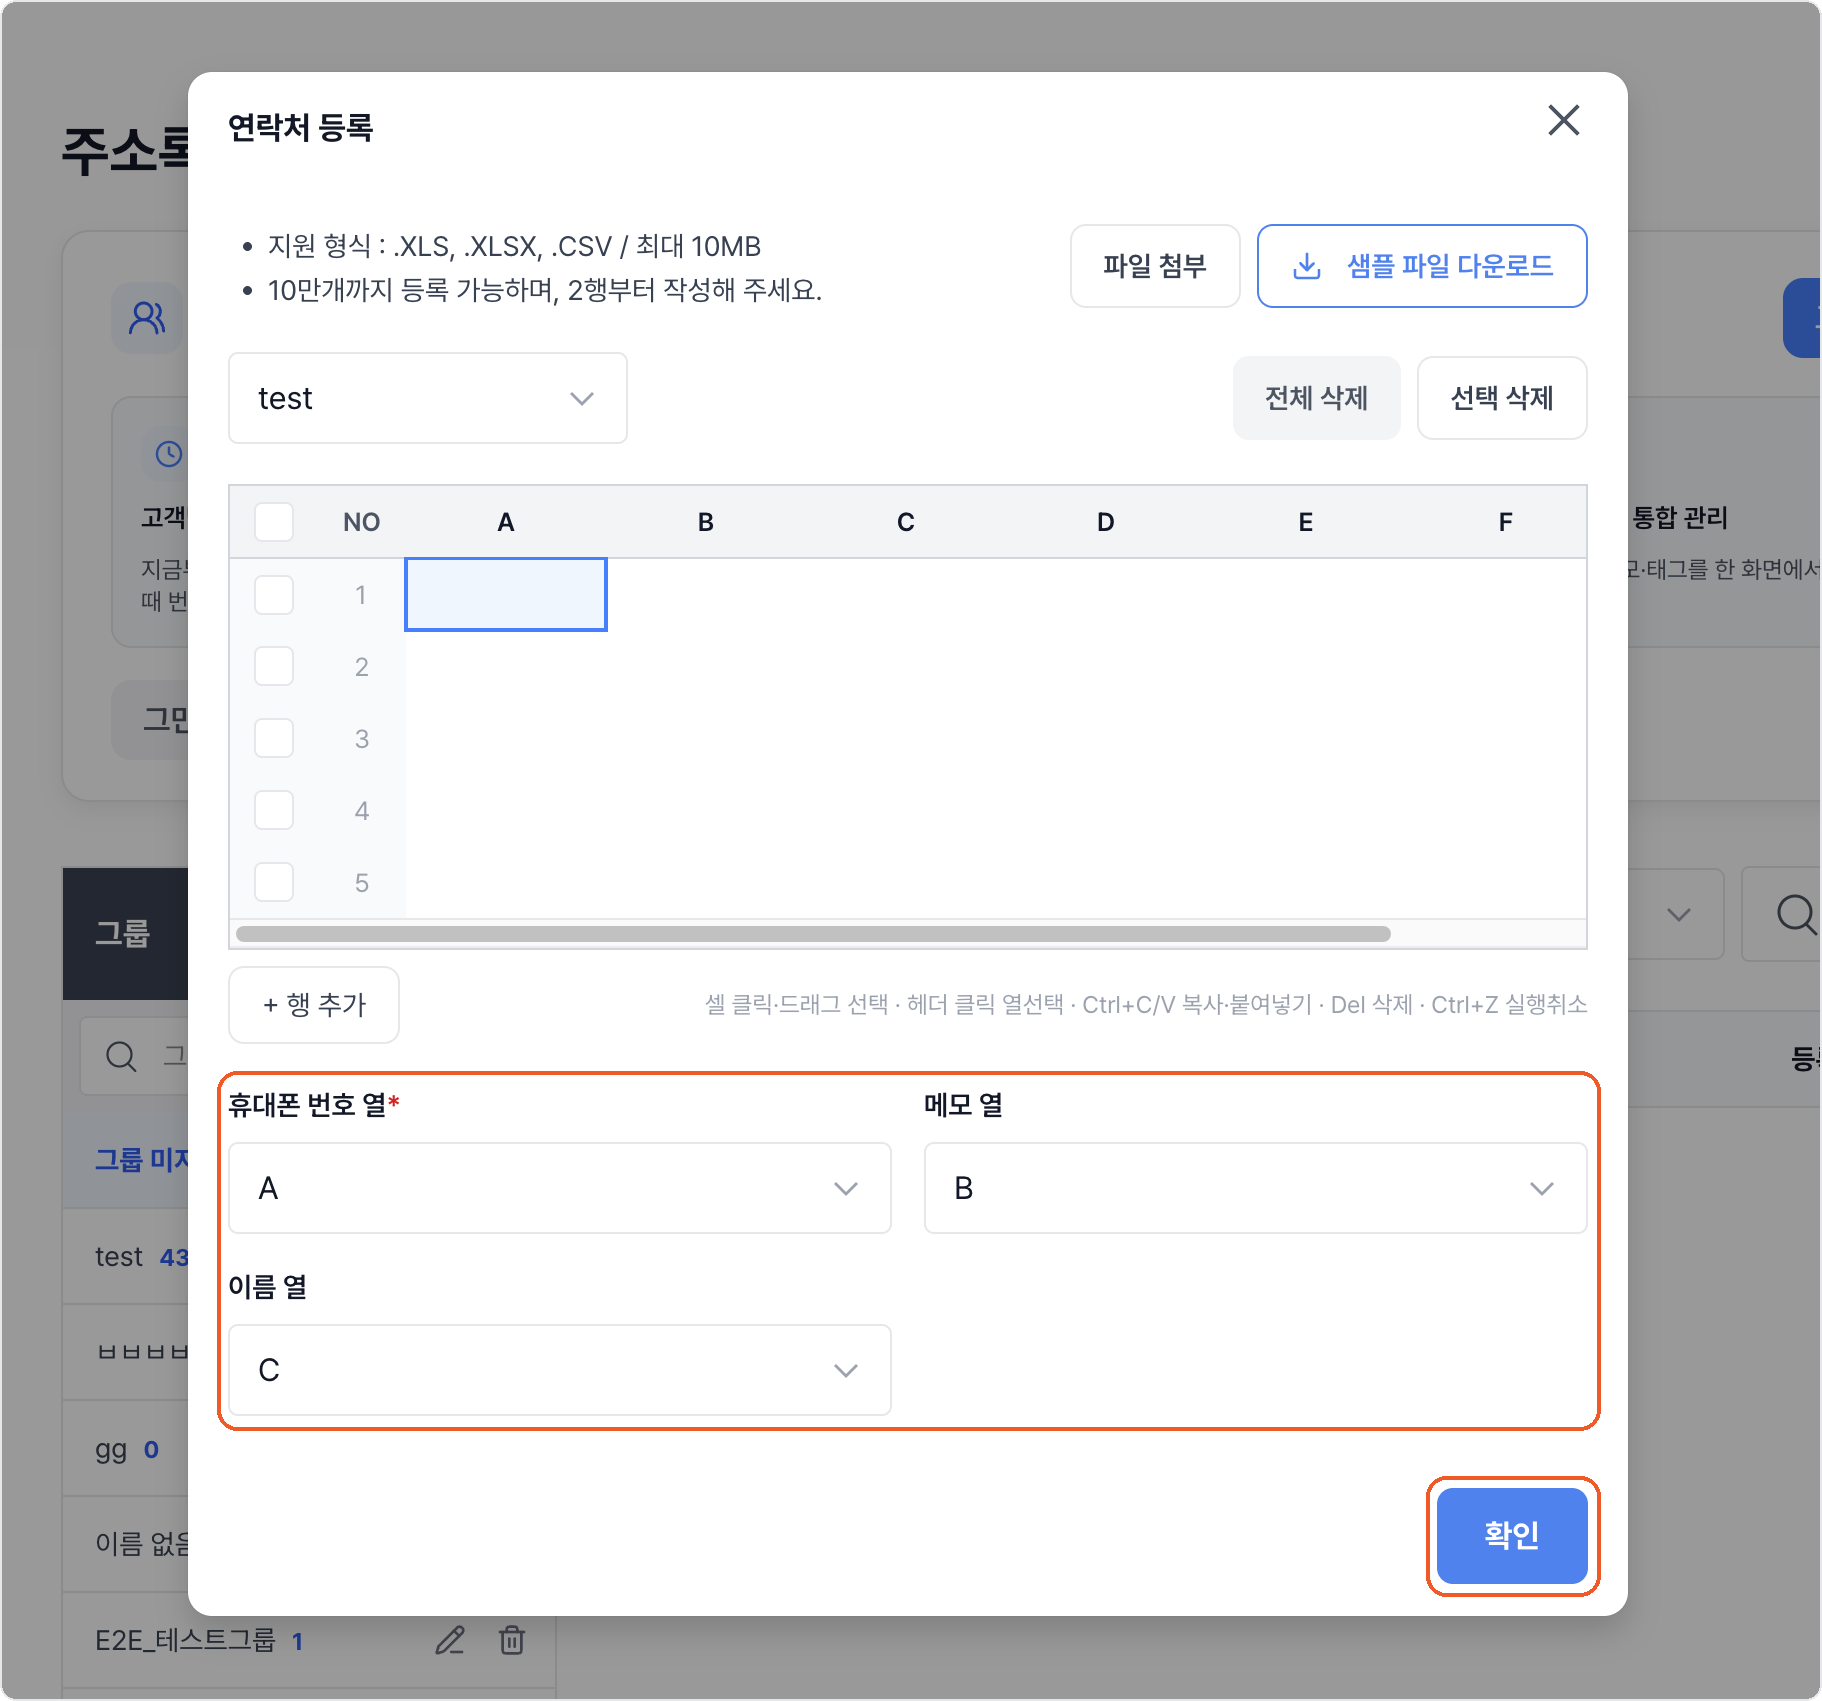
Choose which column holds the mobile number under Mobile number column. If you have memos or names, map Memo column and Name column too, then click Confirm.
4. Manage contacts
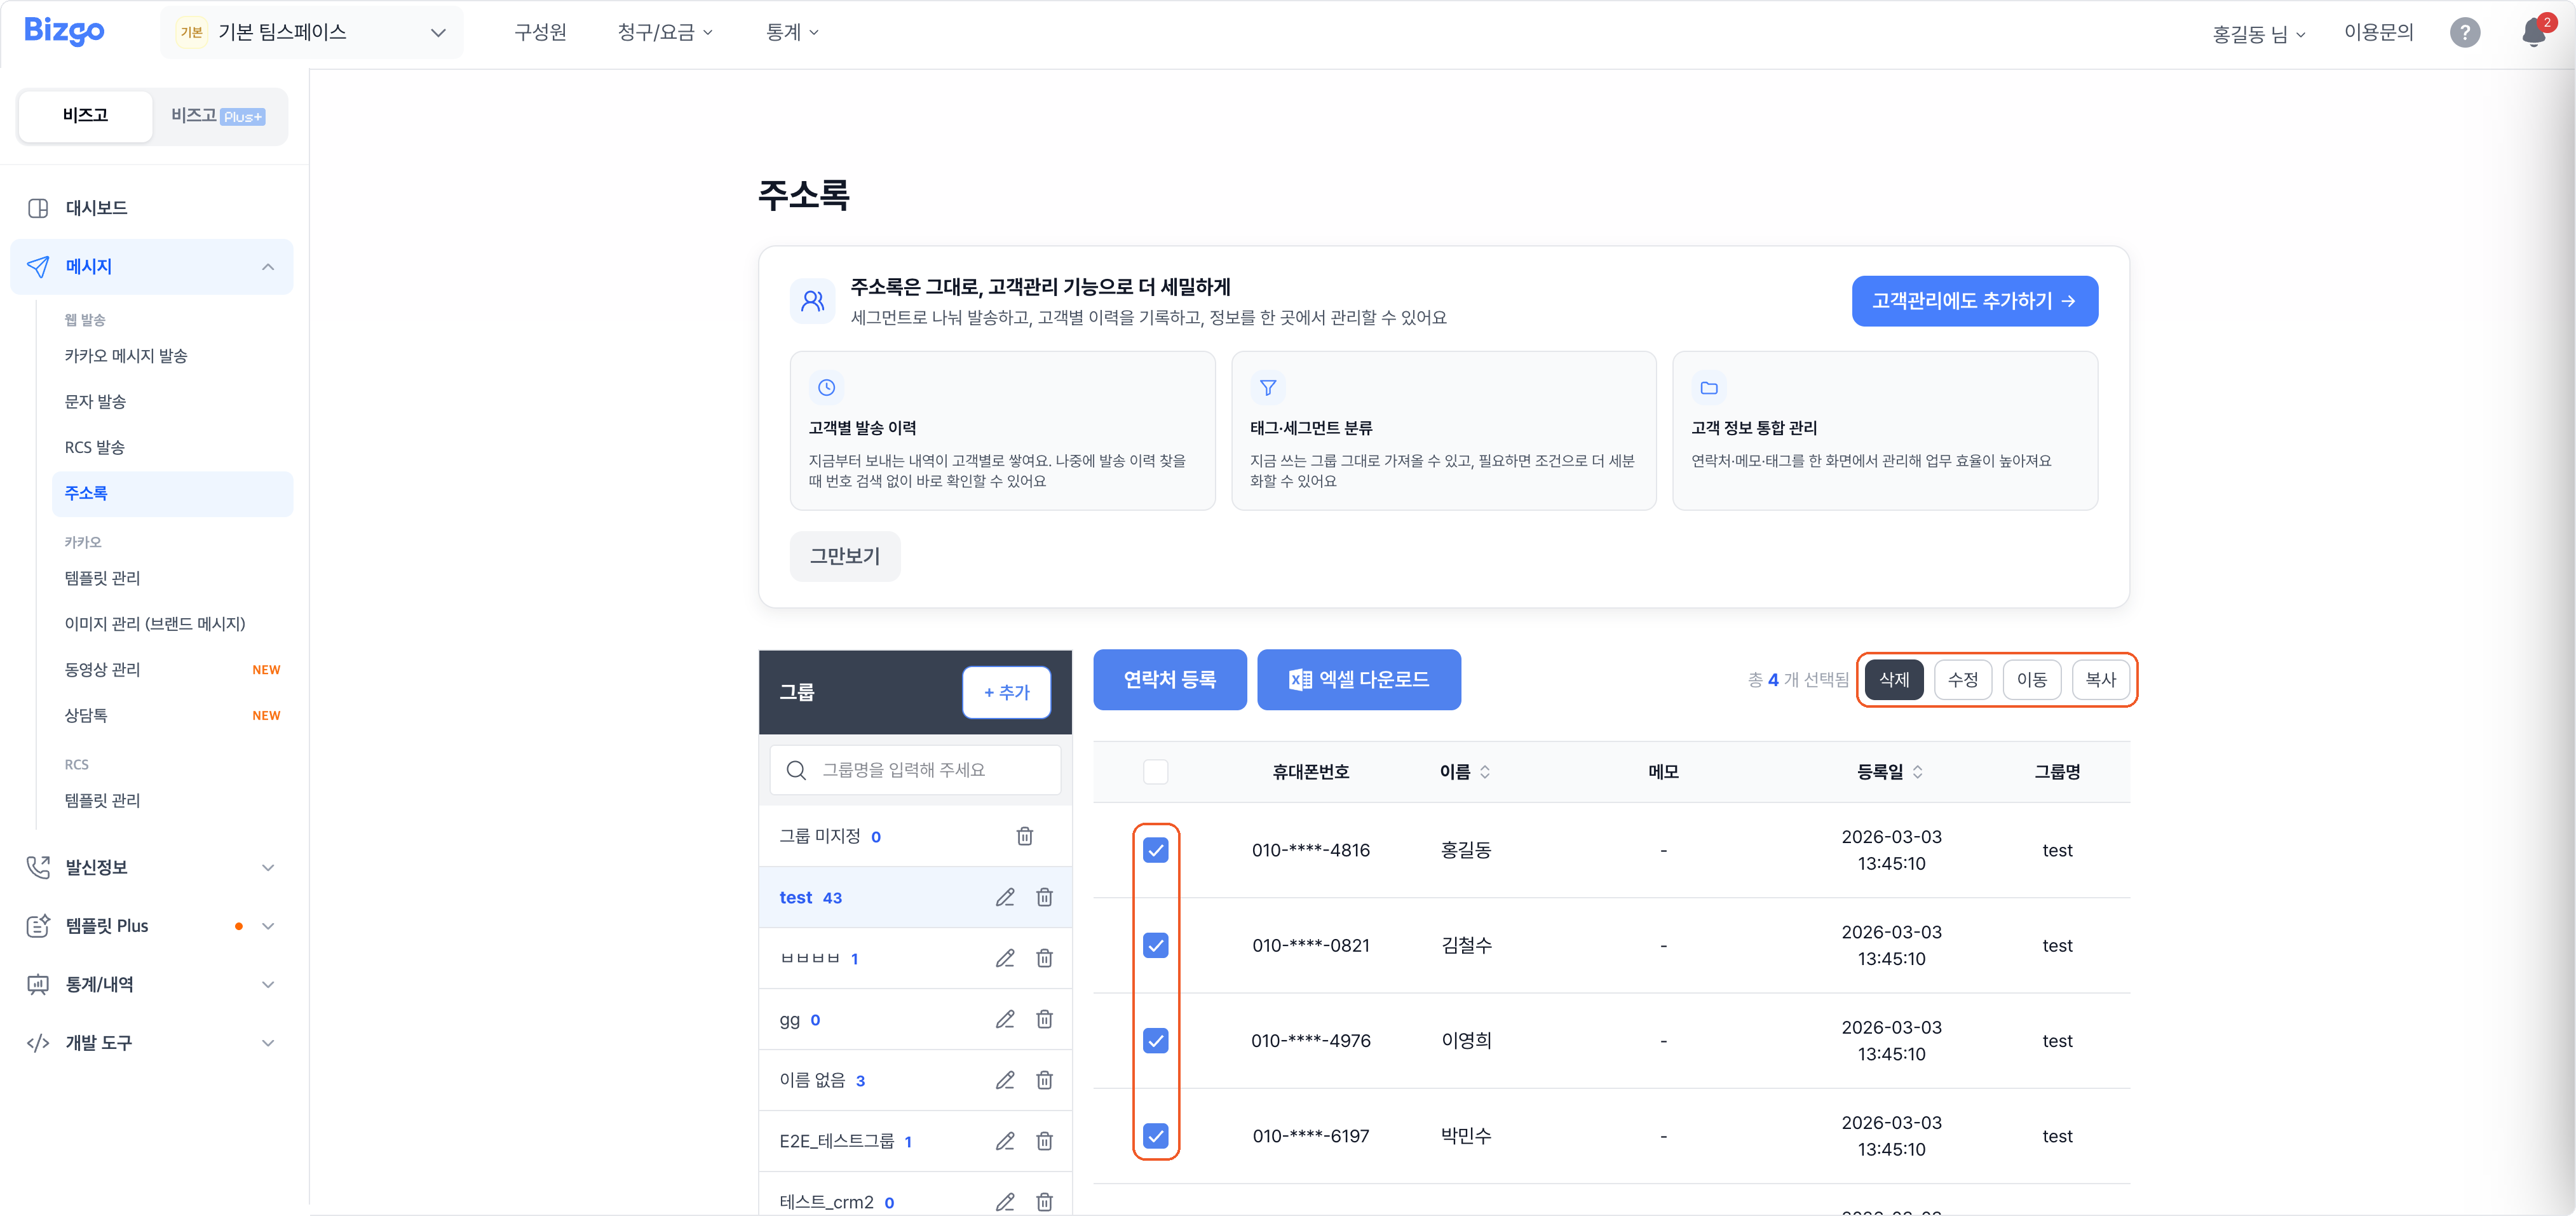
Selecting a group shows its contacts. You can search by mobile number or name and save the list with Download Excel. Check contacts to Edit, Delete, Move, or Copy them to another group.
Address book versus customer management (CRM)
| Address book | Customer management (CRM) | |
|---|---|---|
| What it holds | Mobile number, name, memo | Customer profile, per-customer send history |
| How you segment | Groups you create | Tags, segments |
| Best for | Sending to a fixed list at once | Picking recipients by characteristics |
Also add to customer management above the address book carries the current group straight over.
Next
- Send SMS → Send SMS
- Send KakaoTalk → Send KakaoTalk