
Create and manage team spaces
A team space is a workspace that runs its own plan, sender information, and messages. Splitting them by department or brand keeps charges and billing separate per team space.
Each team space manages the following independently.
Issuing and managing unified keys
Issue the unified key needed for system integration, and check the integration specification, report delivery method, and gateway connection details. You can issue up to five keys per team space; contact the help desk if you need more. See Issue and manage API keys.
Web send
Send messages one at a time or in bulk from the console with no integration. Under the Korea Communications Commission spam policy, new accounts get a quota of 2,000 messages per month and 300 per day. The remaining quota appears on the dashboard and in the team space details, and you can request an increase with Ask about expanding the web send quota.
Registering sender information
Register and manage sender numbers, sender profiles, and other per-service sender information. Sender numbers already registered by another team space or another member can be brought over with Import sender number and requested for use.
080 opt-out service
Bizgo provisions an 080 number through its partner carrier (Sejong Telecom) so recipients can opt out from the footer of a promotional message. The 24-hour ARS system collects the opt-out numbers, which you can review in the console or receive through an API.
Opt-outs are not applied automatically to API sends
Numbers blocked through the 080 opt-out service are excluded automatically only when you send from the Bizgo console. They are not applied to sends made through the API, so you have to remove them from your recipient list yourself.
Download the opt-out list from Bizgo (비즈고) > Sender info (발신정보) > 080 opt-out management (080 수신거부 관리) and apply it in your sending system. The list is also available through an API.
Creating a team space
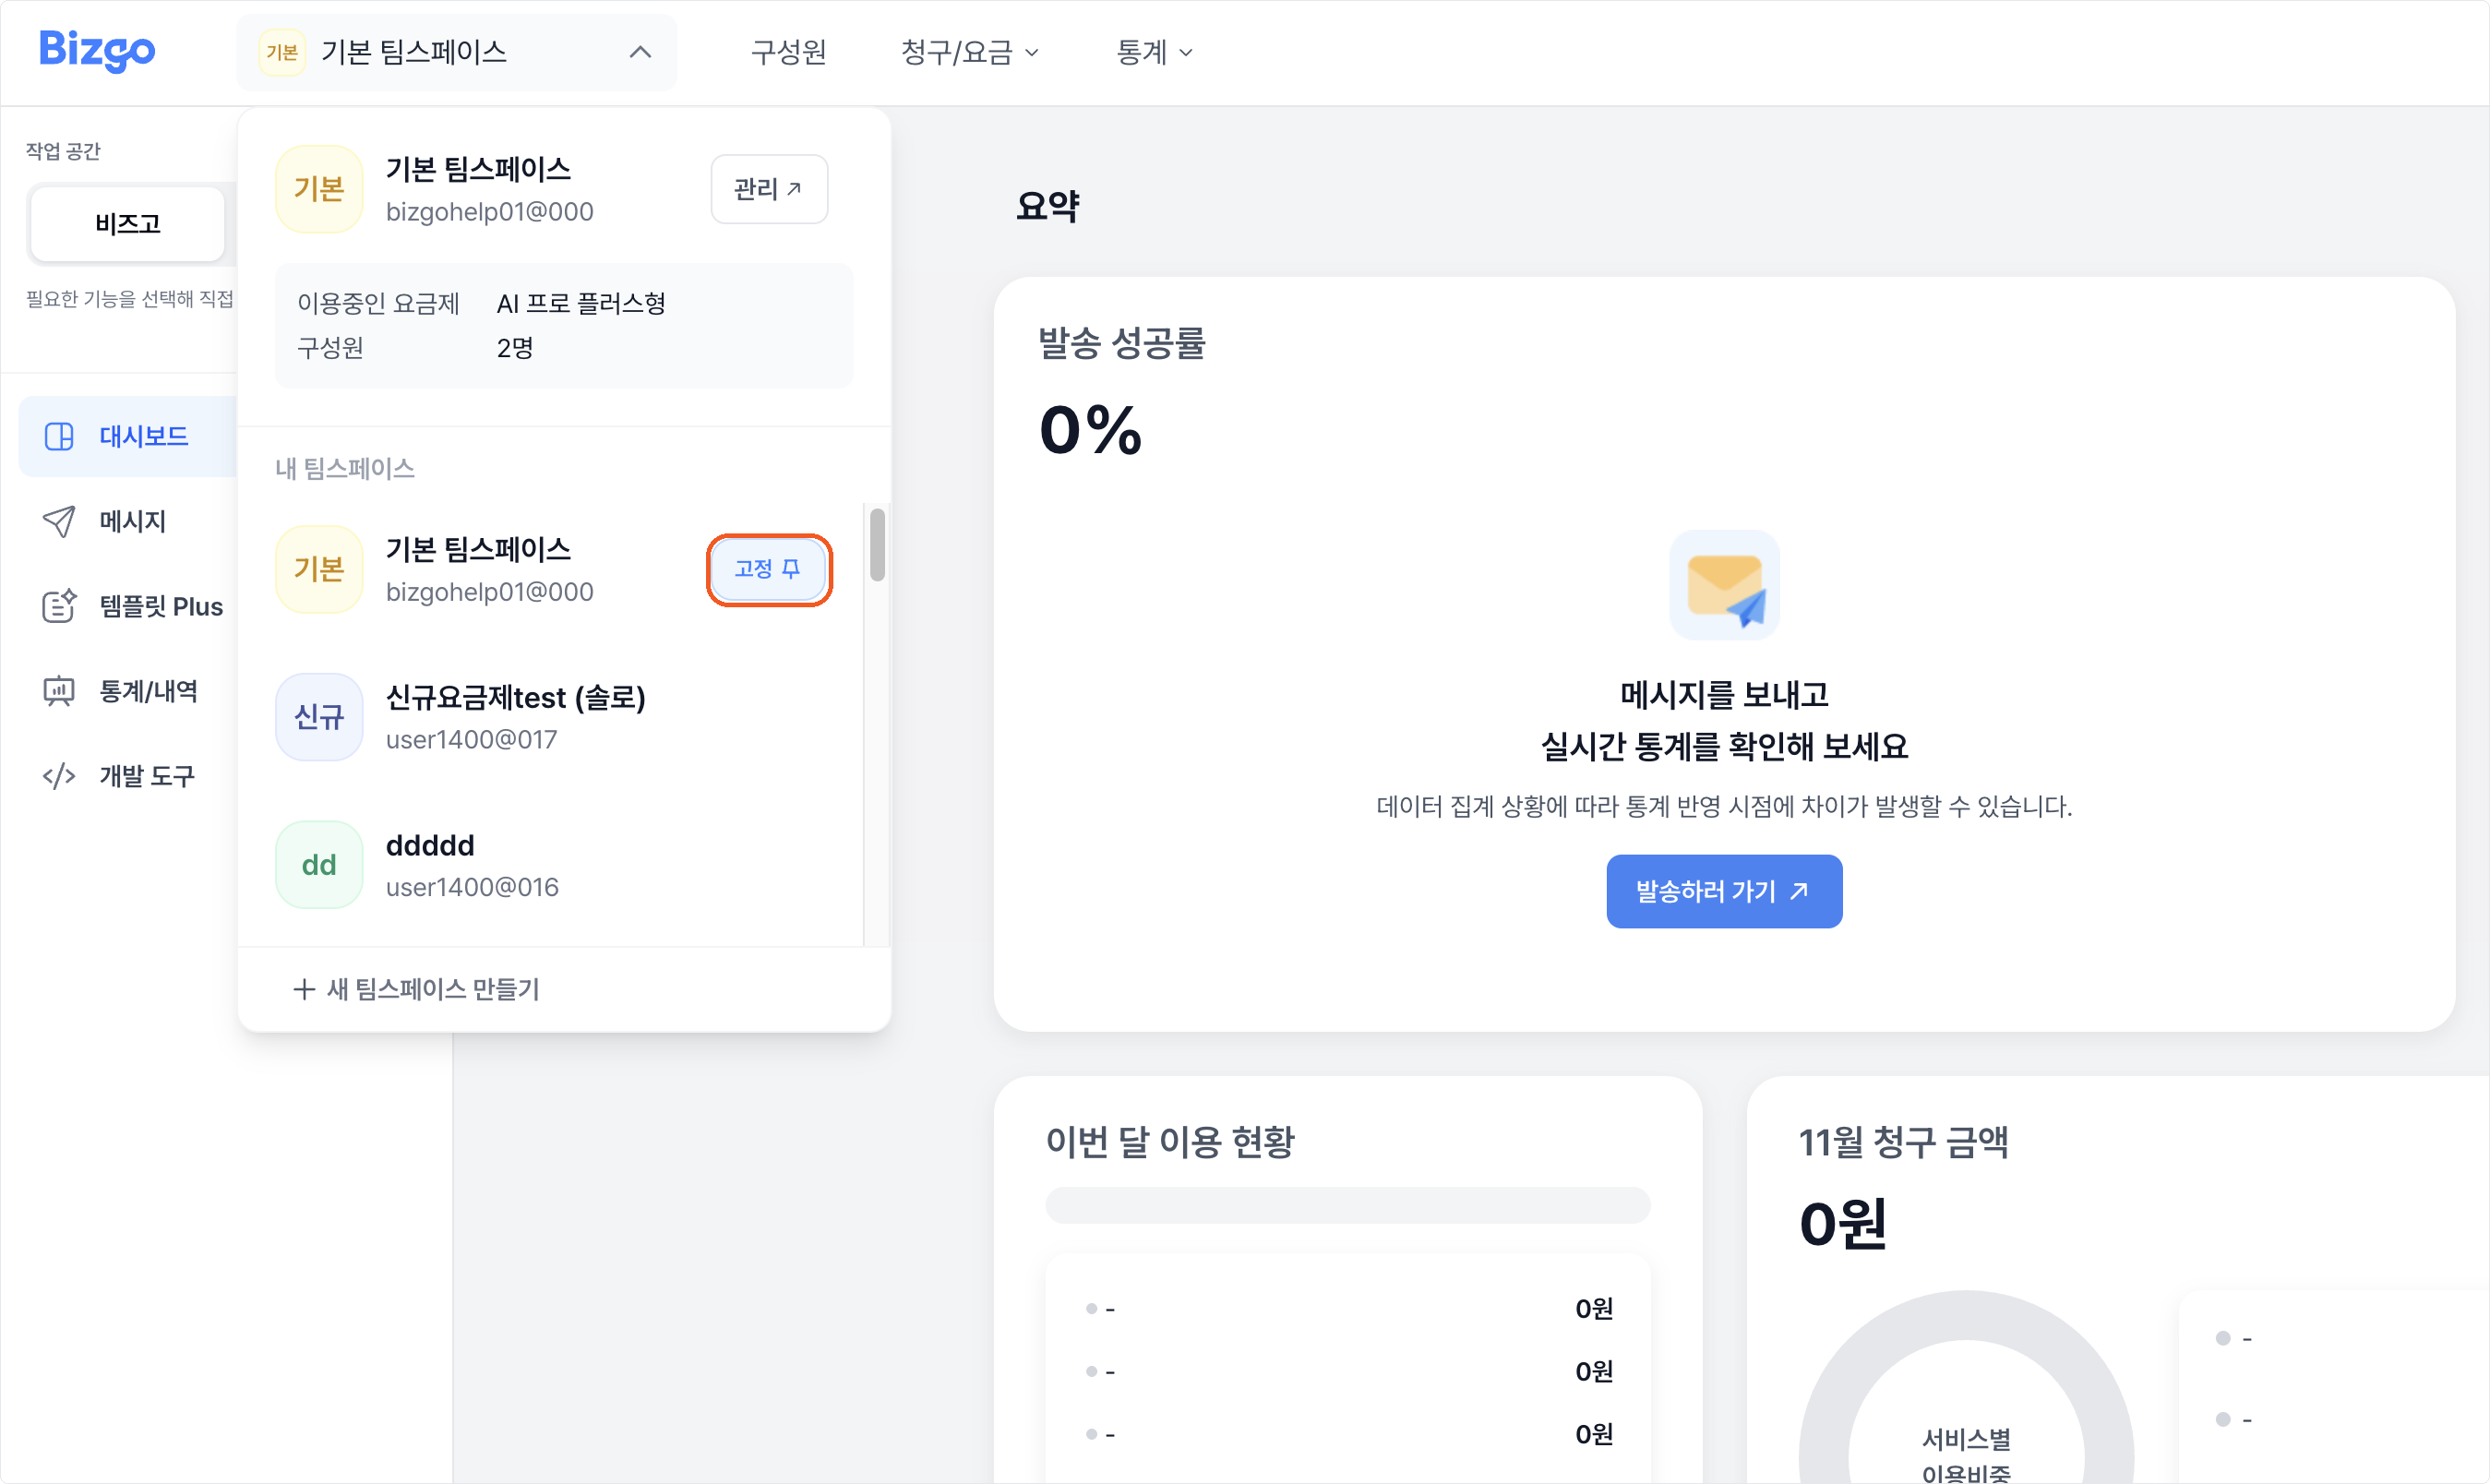
Click the team space name at the top left to open the list, then click + Create new team space below it.
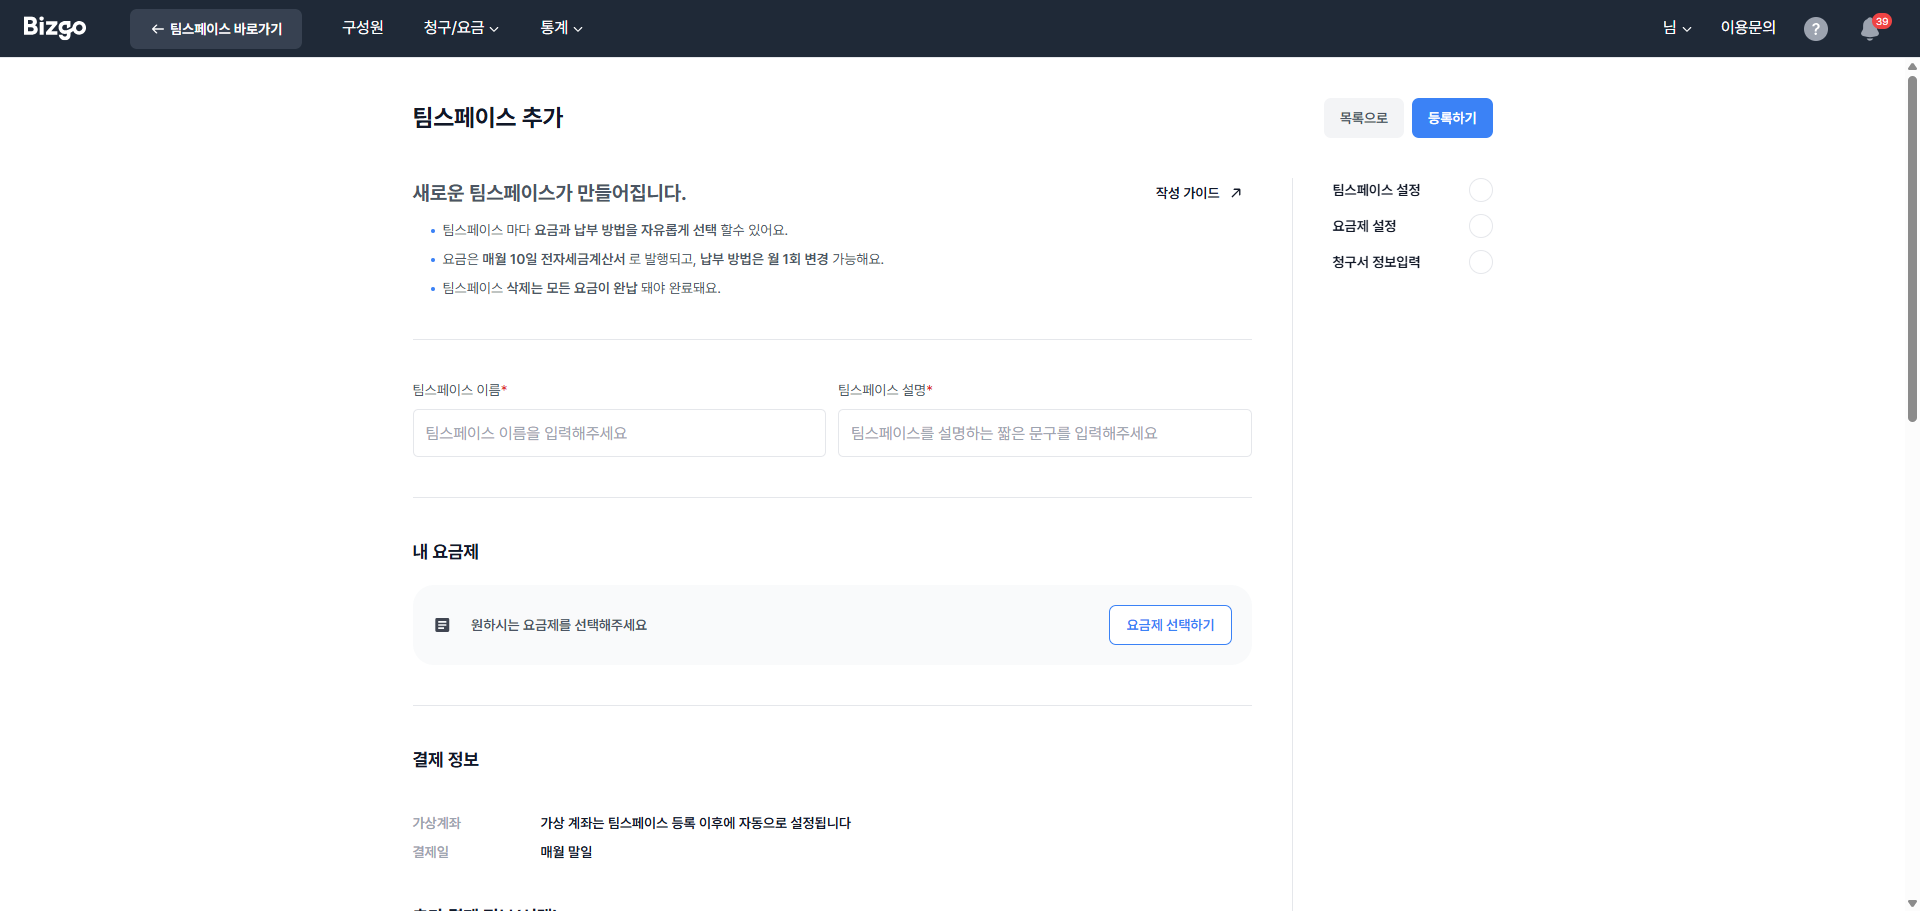
- Enter a name and description — Use a name your members will recognise.
- Choose a plan — Click Choose a plan to pick the plan this team space will use.
- Enter the payment method and billing information — Payment is by tax invoice and the payment date is the last day of each month. A virtual account is set up automatically on registration. To pay by direct debit, click Apply for CMS direct debit. Enter the name, contact, and email that should receive the invoice, then click Register.
You get one team space by default
If you already use the default team space, the You have exceeded the team space limit dialog opens. Enter how many you need and why, then click Request to ask for an increase.
Creating a team space and changing its settings require the Master role.
Invoices arrive by email
The electronic tax invoice is issued on the 10th of each month (the preceding business day if that is a holiday), and the invoice is sent to the billing email the next day. Register several addresses with Add email.
Pinning a team space you use often
Click Pin in the team space list and you start in that team space every time instead of looking for it.
Managing a team space
Click Manage on the current team space above the list to open its details. You can check whether web send is enabled, the monthly and daily web send quota, the plan, the payment method, and the billing information.
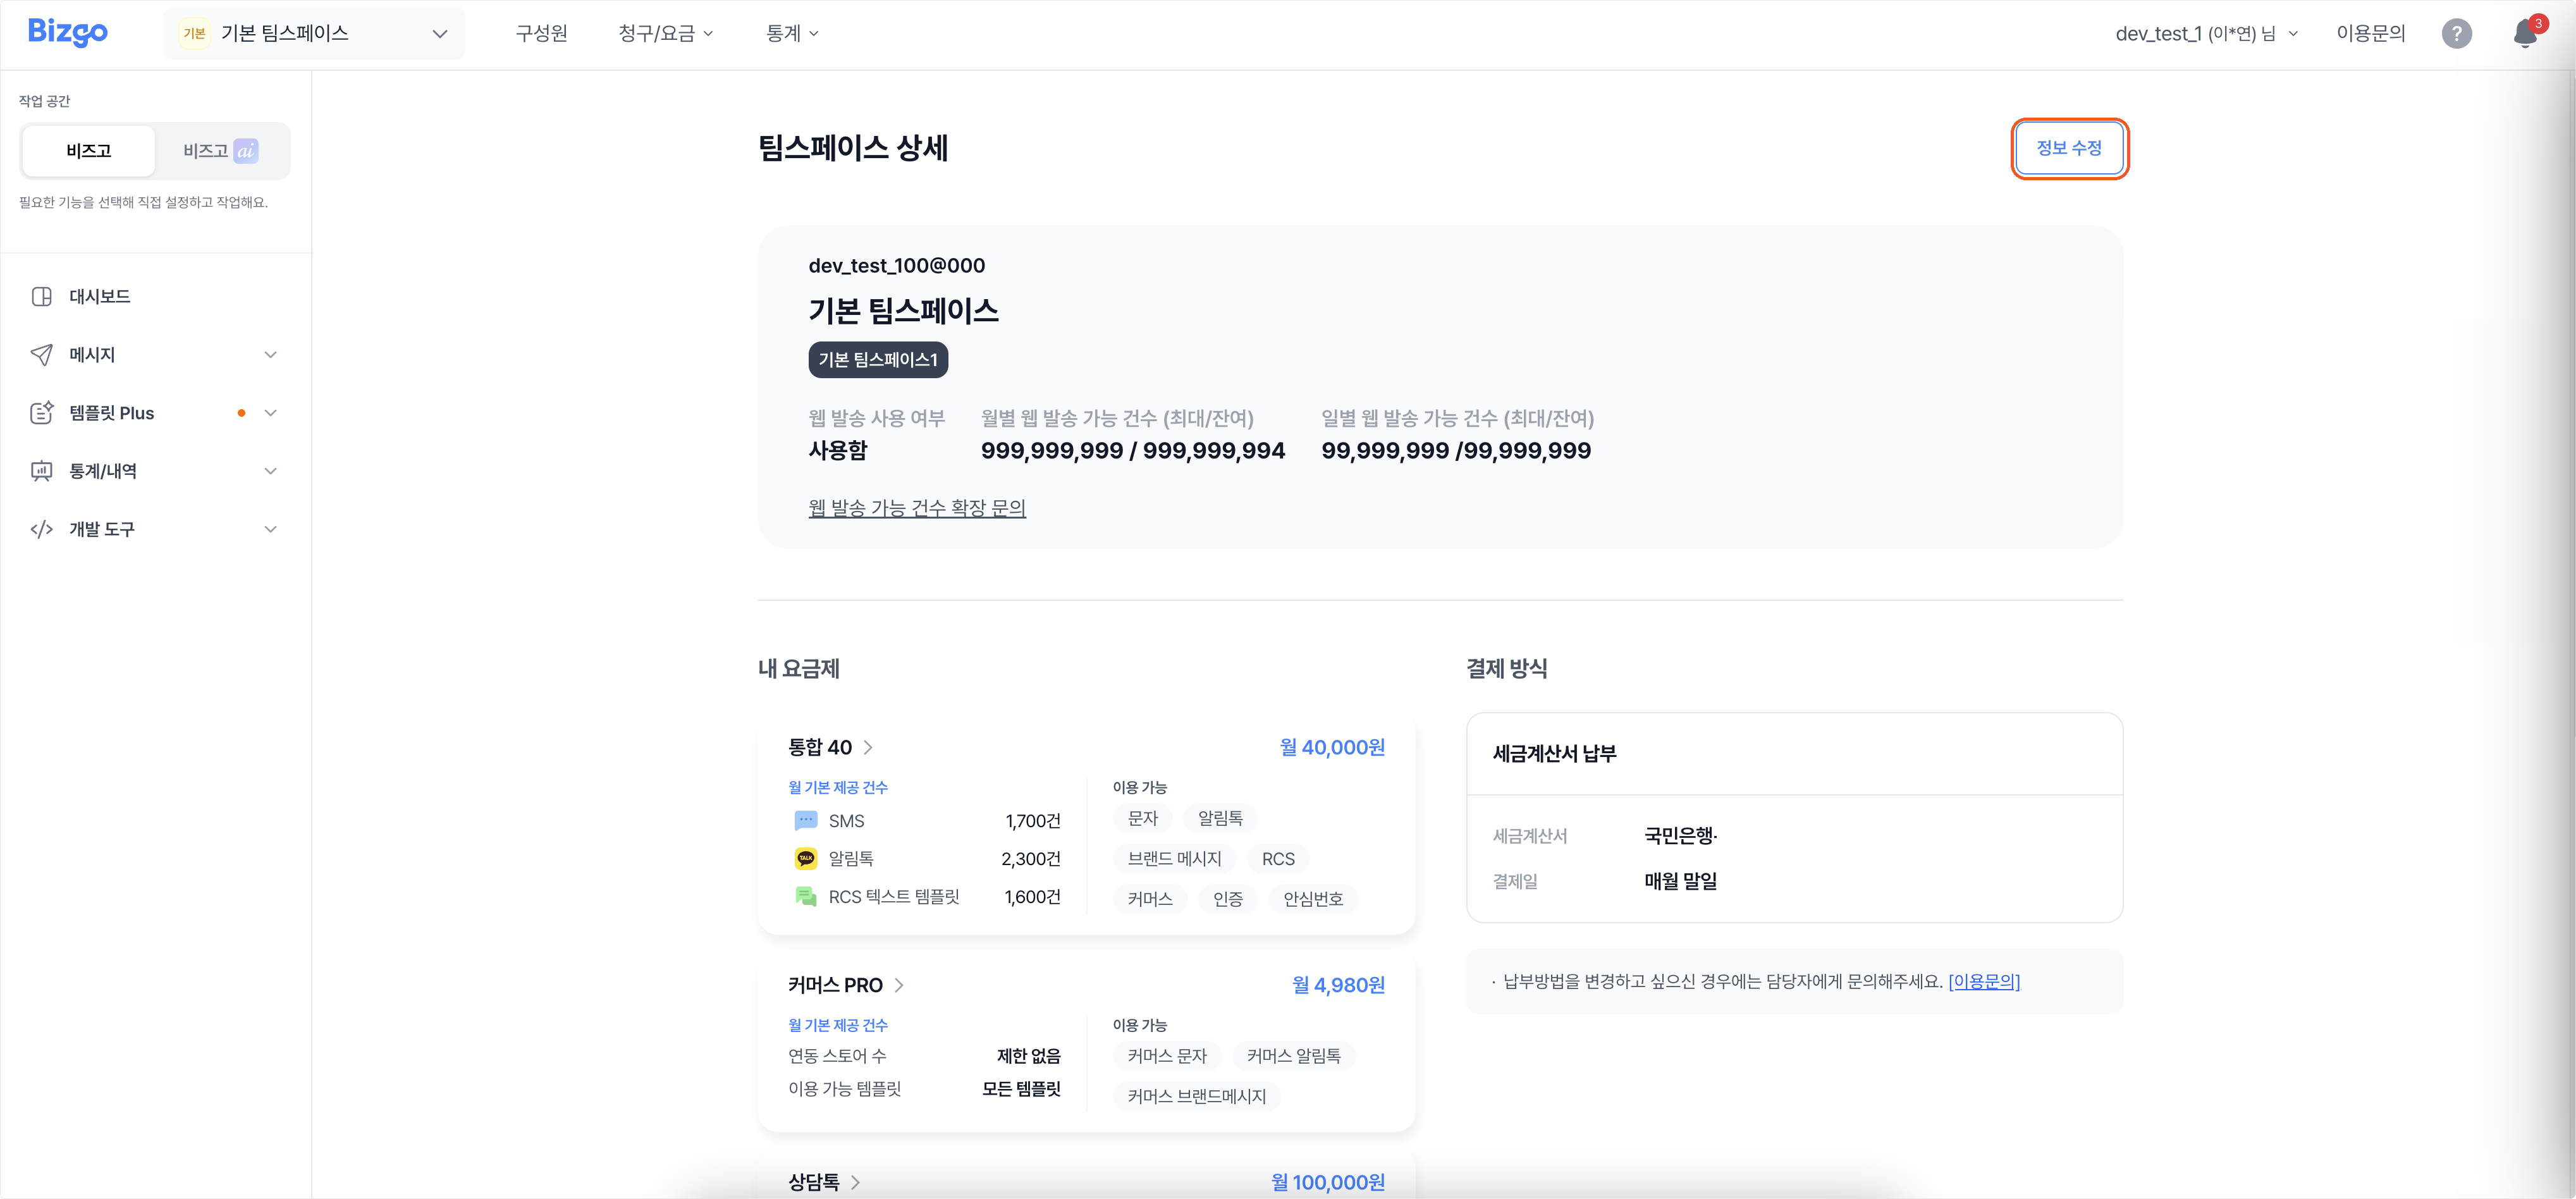
Click Edit information to change the name, description, and billing information, then click Save.
To delete it, click Delete team space at the bottom of the Edit information screen. Deletion completes only once all charges for that team space are paid.
When you can change the payment method
Change the payment method between the 6th of the current month and the 5th of the next, and it applies from the current month's usage. For earlier usage, ask through Service inquiry.
Next
- Giving teammates access → Invite teammates
- Issuing a unified Key → Issue and manage API keys