
Group customers with tags
Create tags that mark a customer's state — «Joined the event», «Conversation closed», «Long-term customer» — and manage them. Tags are used on customer profiles and in segment conditions.
Go to Bizgo Plus+ > Customer management > Tags.
1. Create a tag
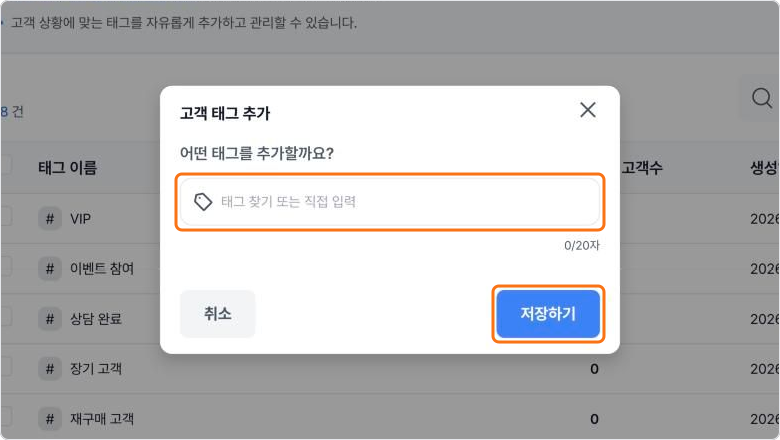
Click Create customer tag to open the «Add customer tag» dialog. Type the tag name, press Enter, then click Save.
| Check | Detail |
|---|---|
| Length | Up to 20 characters |
| Duplicates | A name that already exists cannot be reused |
| Creating several | Enter several names and save them in one go |
Tagging a customer directly
Select the customer under Customer profiles and click Add tag. You can also apply tags while importing customers from Excel.
2. Review the tag list
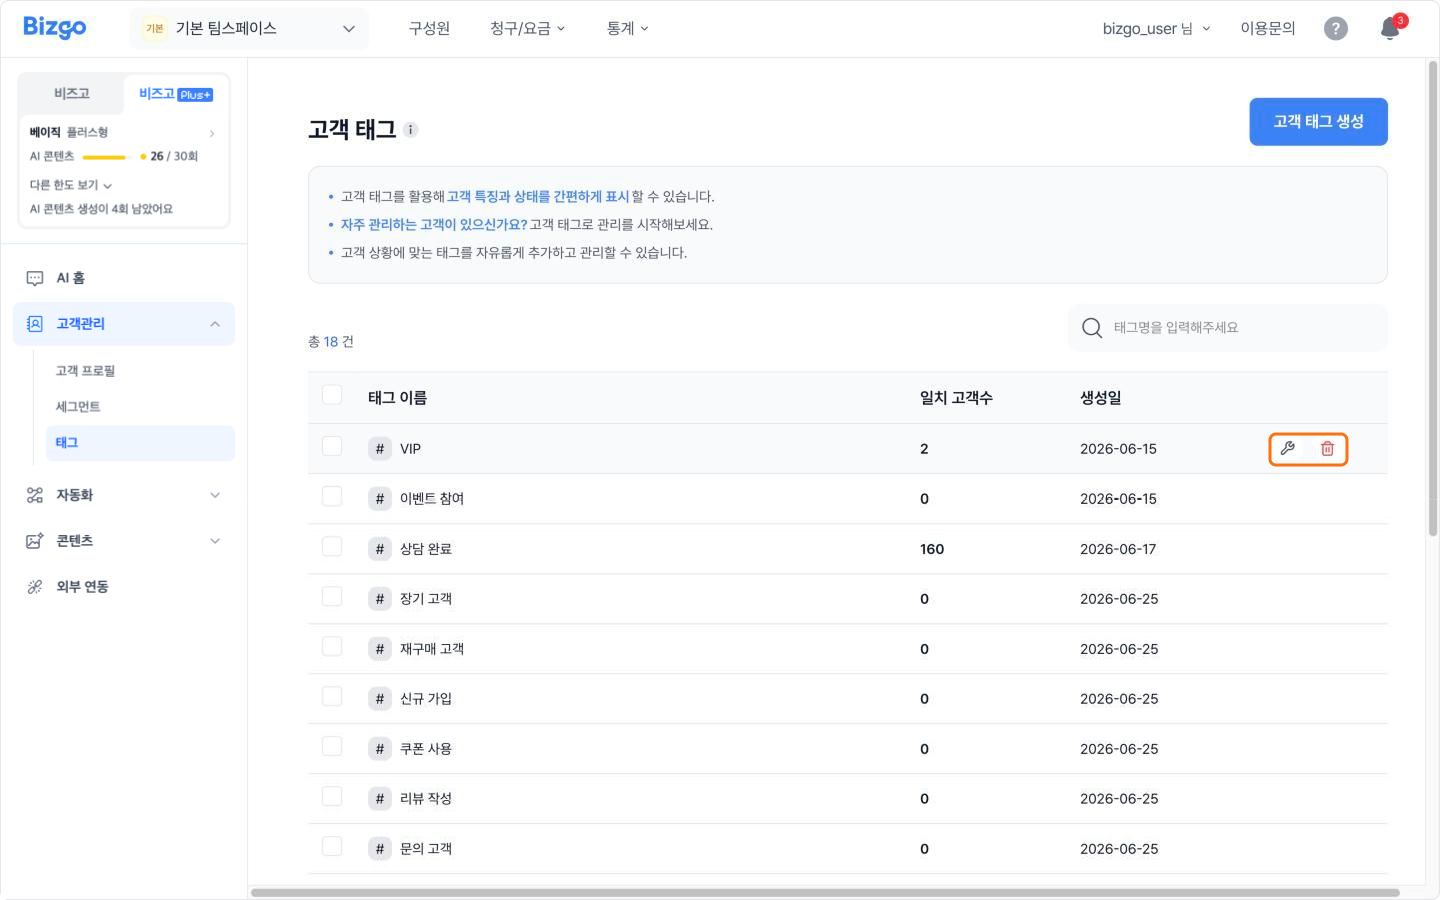
The list shows each tag's name, how many customers match, and when it was created. Type a tag name in the search box above to find one quickly.
3. Review customers by tag
Clicking a tag opens the «Tag profile» screen, where you can search the tagged customers by name or mobile number.
After customer details change, click Sync profiles on the «Tag profile» screen to bring the list back in line.
4. Rename or delete a tag
Hover over the tag row and click the edit or delete icon. To rename it, type the new name and click Save changes. To remove several at once, tick them on the left and click Delete selected tags.
Deleting a tag cannot be undone
The tag is removed from every customer profile that carried it. A tag used in a segment condition cannot be deleted — clear that condition from the segment first.
Next
- Managing a fixed list instead → Manage recipients with the address book
- Sending → Send KakaoTalk messages