
Auto-reply to Instagram DMs
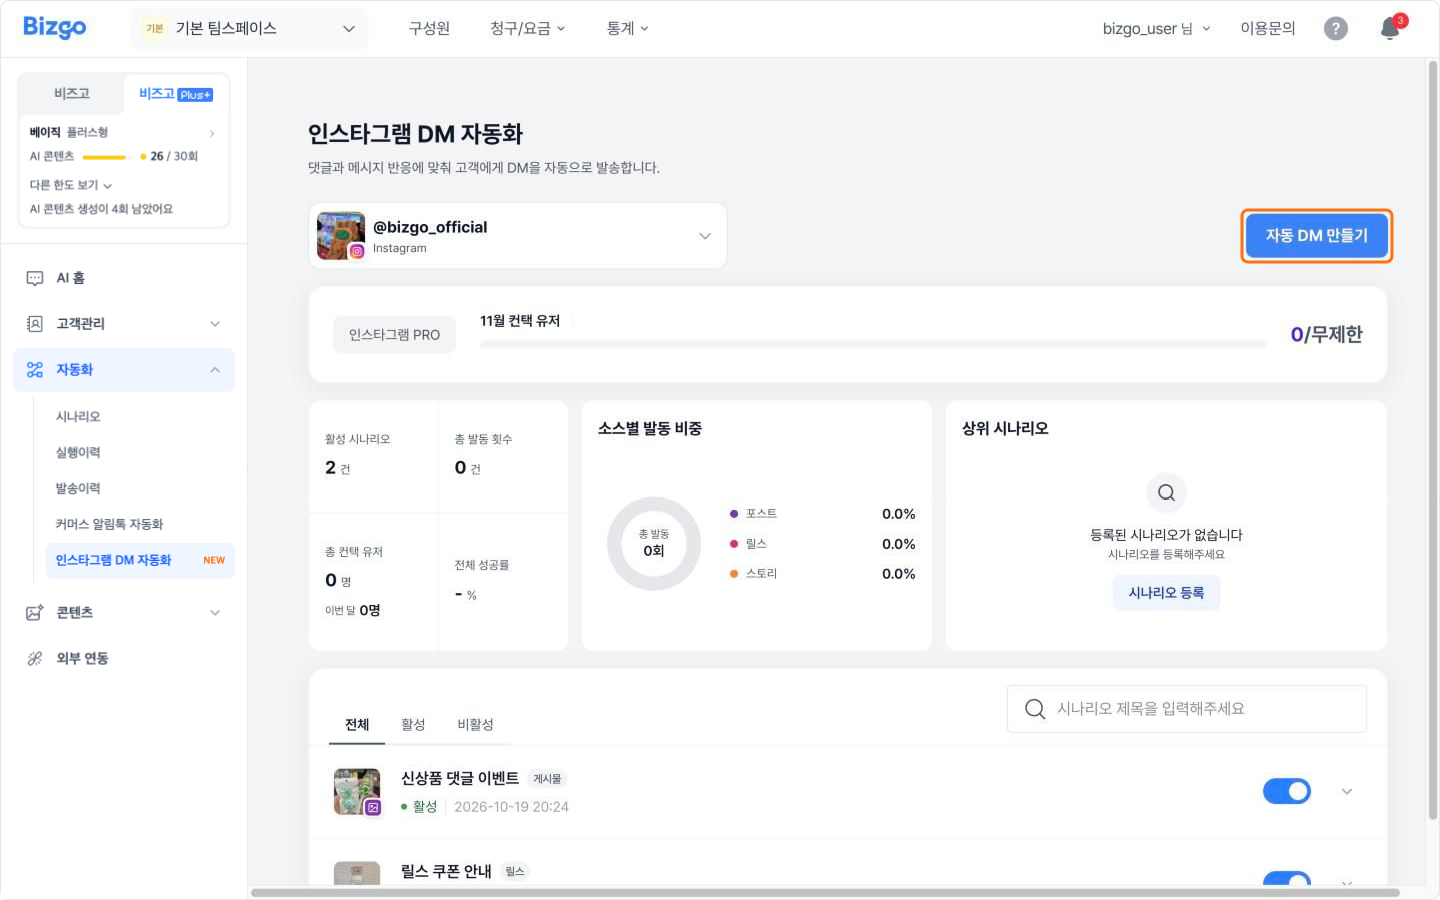
Send a DM automatically when someone comments on a post or reel, or replies to a story. Go to Bizgo Plus+ > Automation > Instagram DM automation.
Connect an Instagram business account first
With no account connected, click Connect account and link it under External integrations. Connecting requires business verification. → Business verification
1. Start building an auto-DM
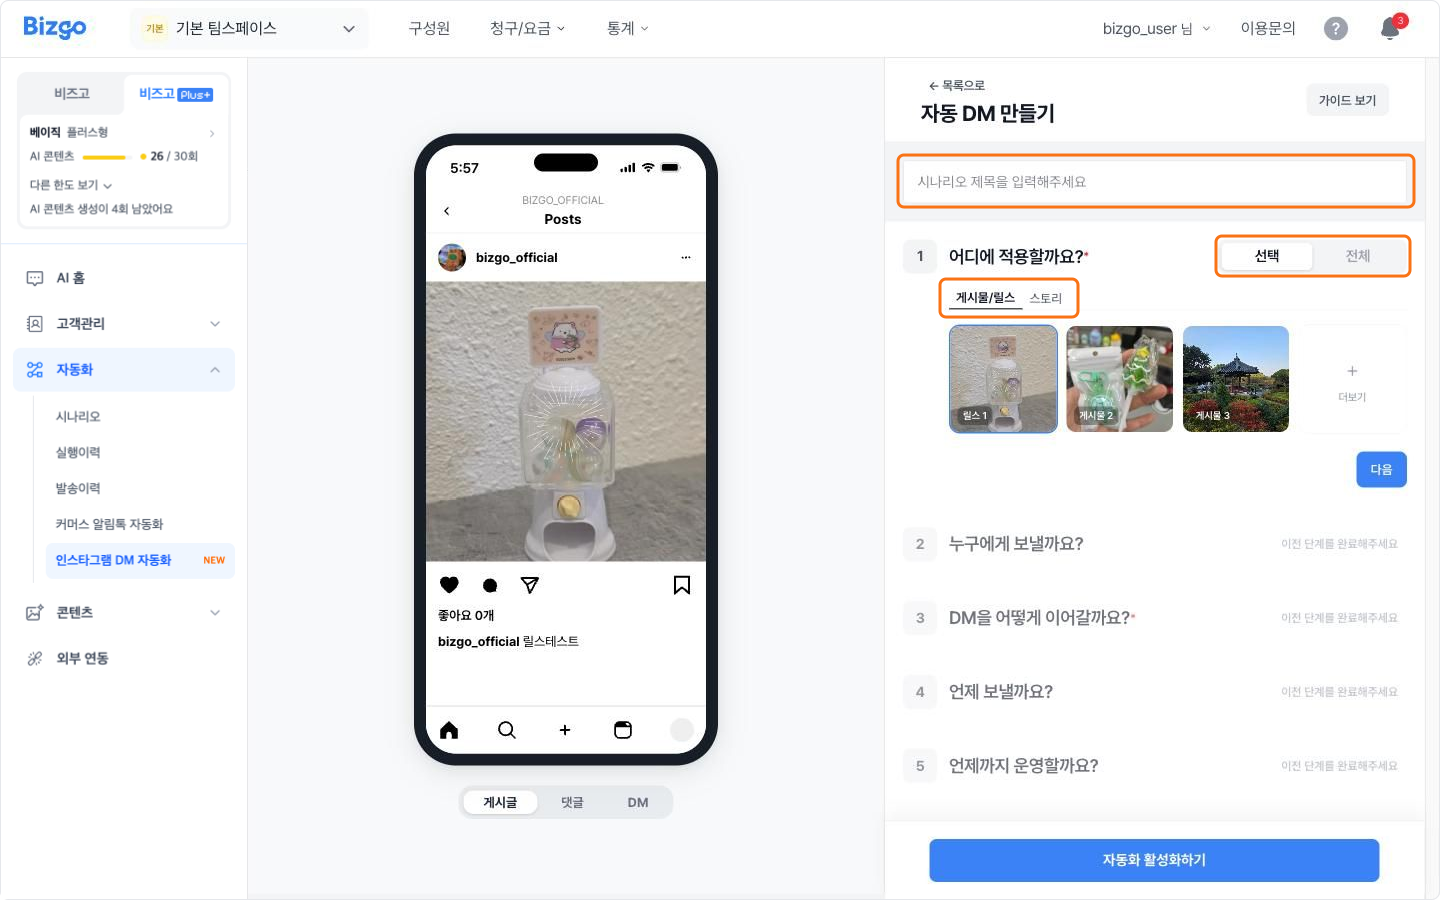
Click Create auto-DM and enter a title. Choose where it applies on the Posts/Reels or Stories tab. The title is 2–128 characters.
Changing the target clears your settings
Switching to another type discards everything you entered. Read the confirmation dialog before clicking Change.
2. Choose the posts it applies to
Under «Where should it apply?», choose Selected or All. With Selected, pick the posts.
3. Decide who receives it
Under «Who should receive it?», choose All comments or Specific comments (keywords). Stories show as All story replies. Type a keyword and press Enter to add it, up to 5.
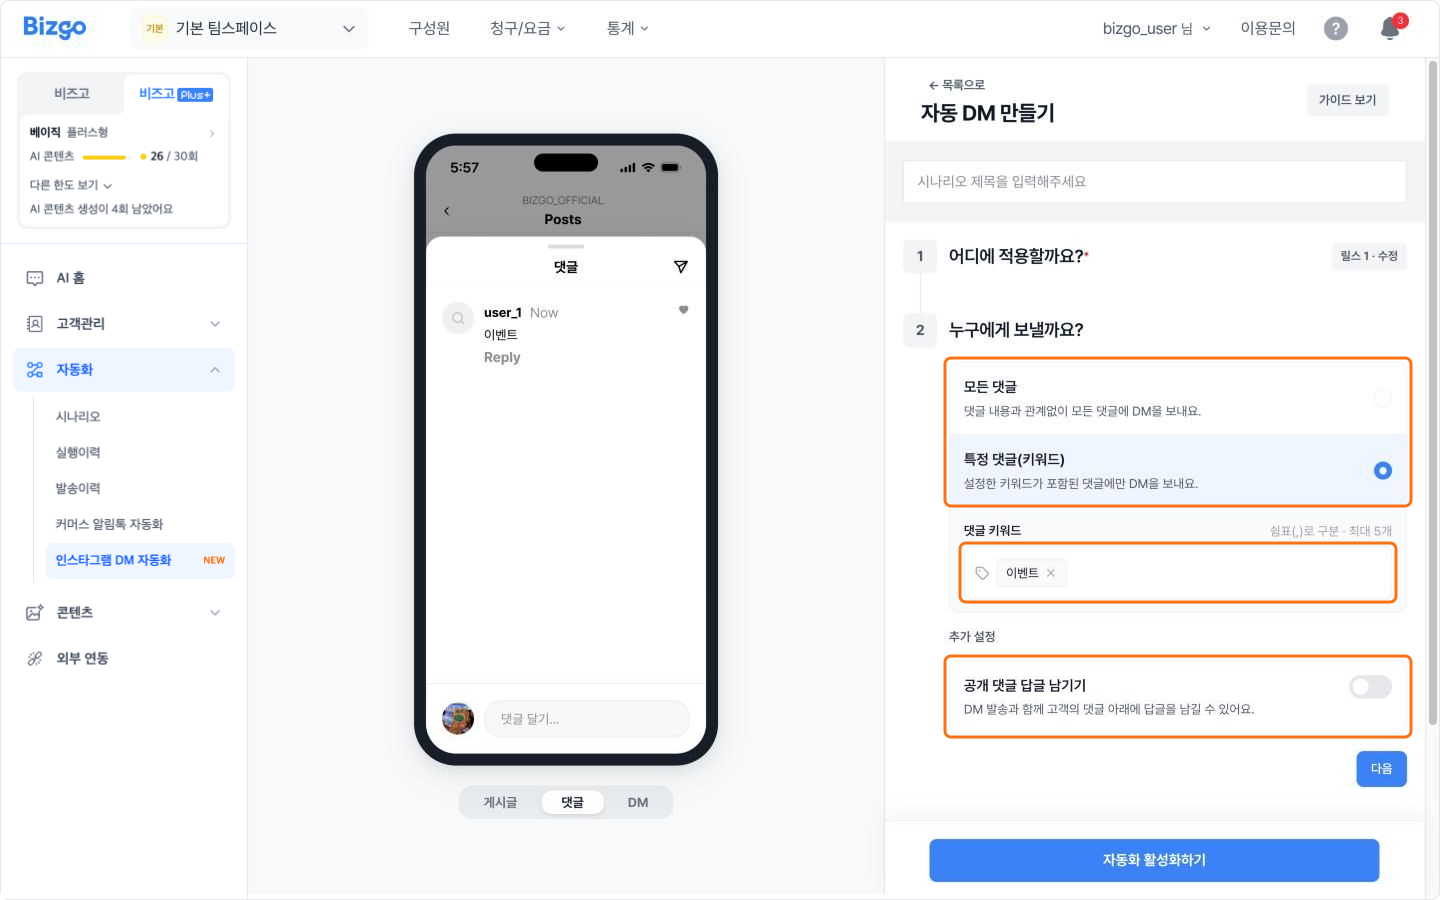
To reply in the comments as well, turn on «Leave a public reply» and write it. Stories do not have this setting.
4. Write the DM
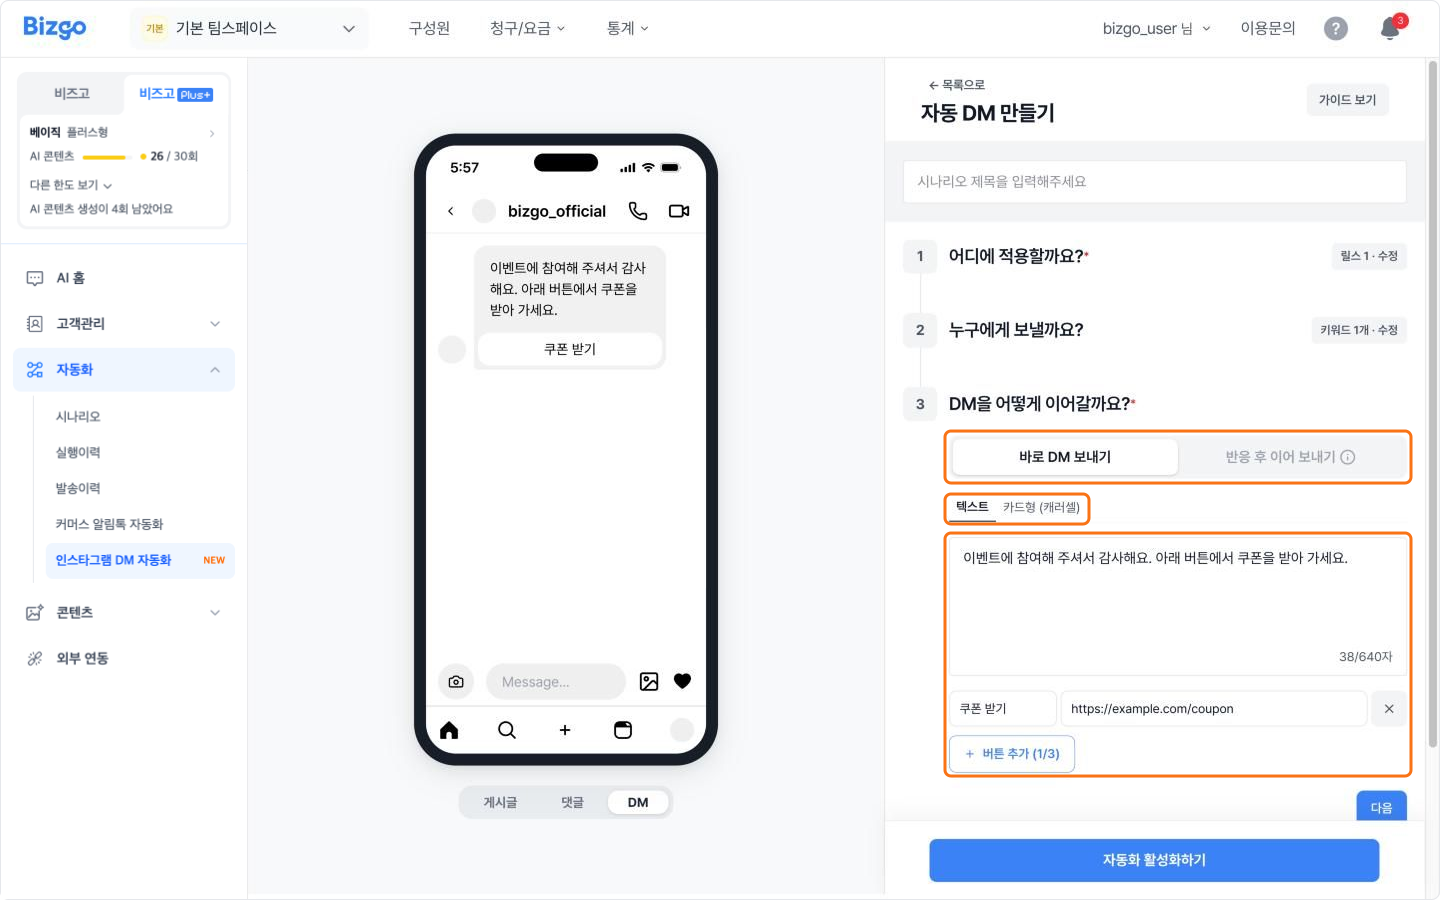
Choose Send the DM straight away or Follow up after a reaction, then write the content as Text or Cards (carousel). Stories support Send the DM straight away only.
| Field | Limit |
|---|---|
| DM body | 1,000 characters, or 640 with buttons |
| Buttons | 3, with names up to 20 characters |
| Button link | An address starting with http:// or https:// |
| Cards | 10 for a direct DM, 1 for a follow-up |
| Card subtitle | 80 characters |
| Public reply | 1,000 characters |
5. Set the timing and how long it runs
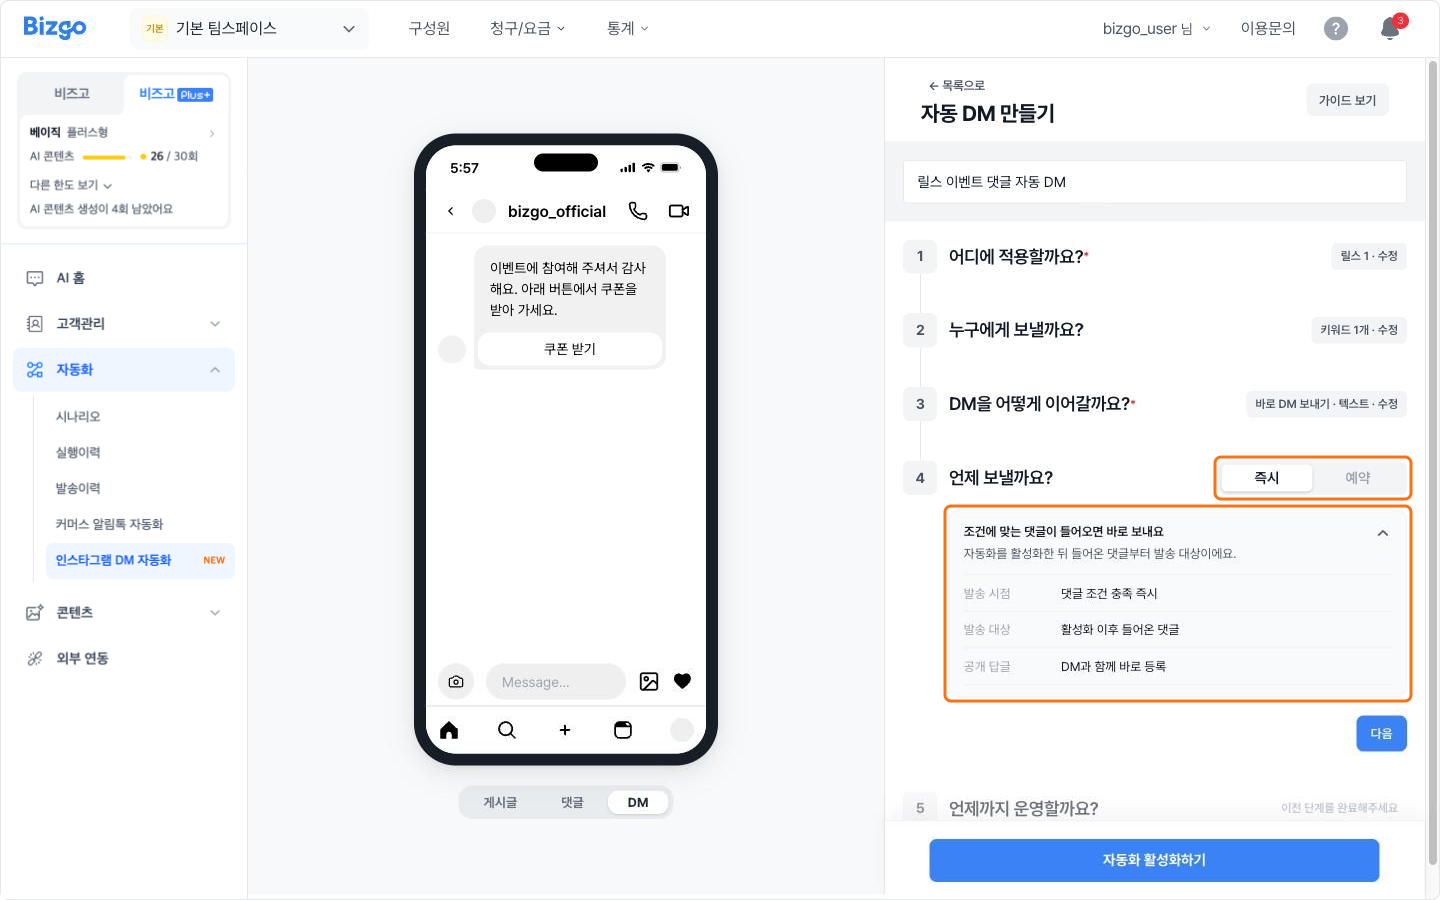
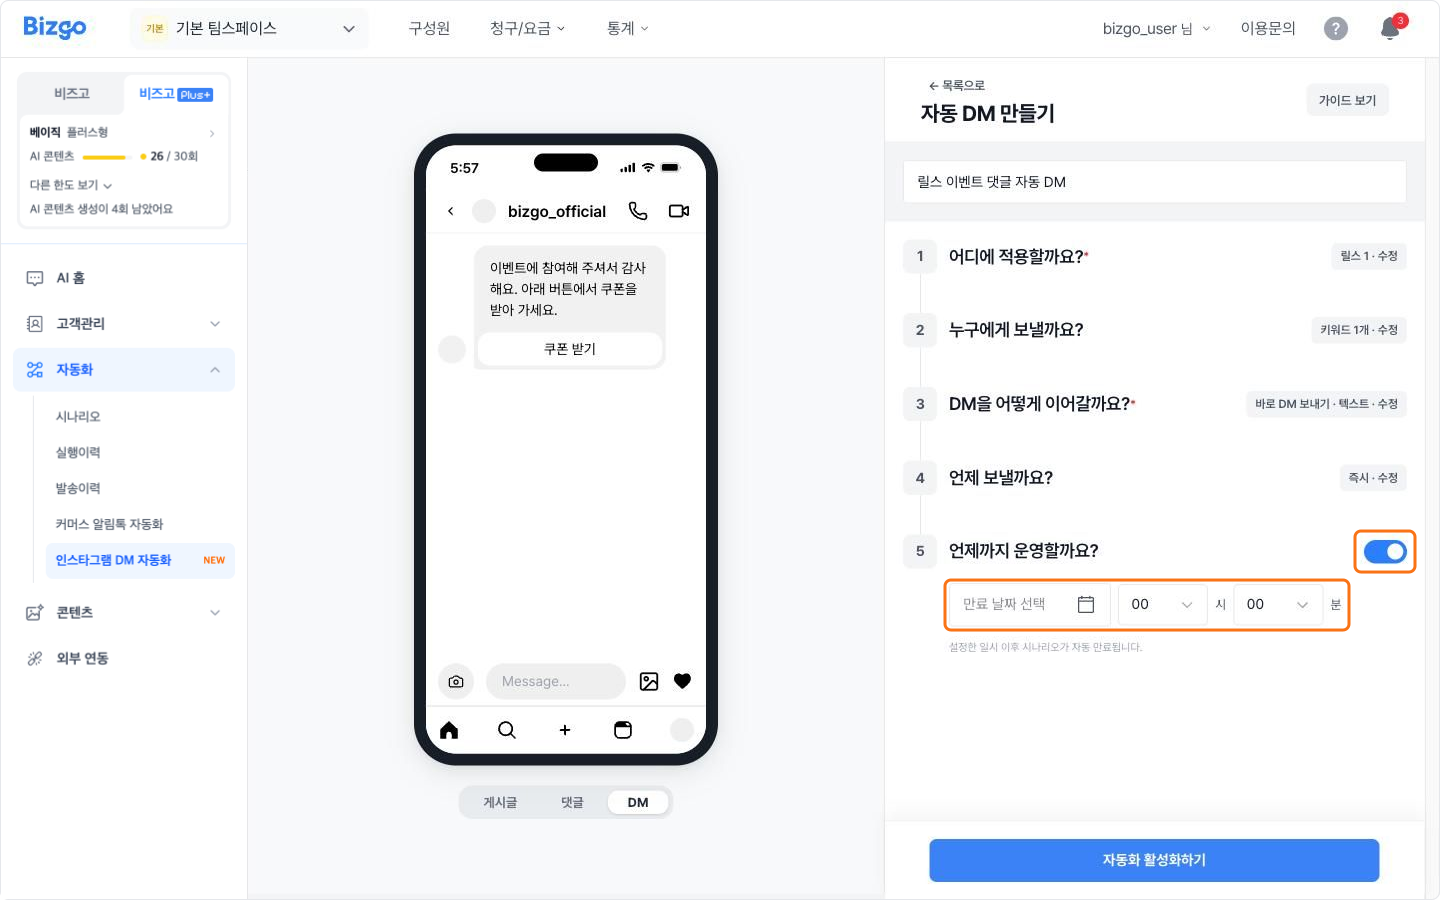
Under «When should it send?», choose Immediately or Scheduled. Choose how long it runs under «How long should it run?».
| Run period | Behaviour |
|---|---|
| Stop after the scheduled send | Stops on its own once the scheduled send finishes |
| Set an expiry date | Runs until the date you set, then stops |
| No expiry | Runs until you switch it off |
Schedules start 10 minutes out
A schedule can be set from 10 minutes from now, and it cannot be edited within 10 minutes of the send. Scheduled sends go out at up to 1,000 per hour. Stories expire automatically 24 hours after posting.
6. Switch the automation on
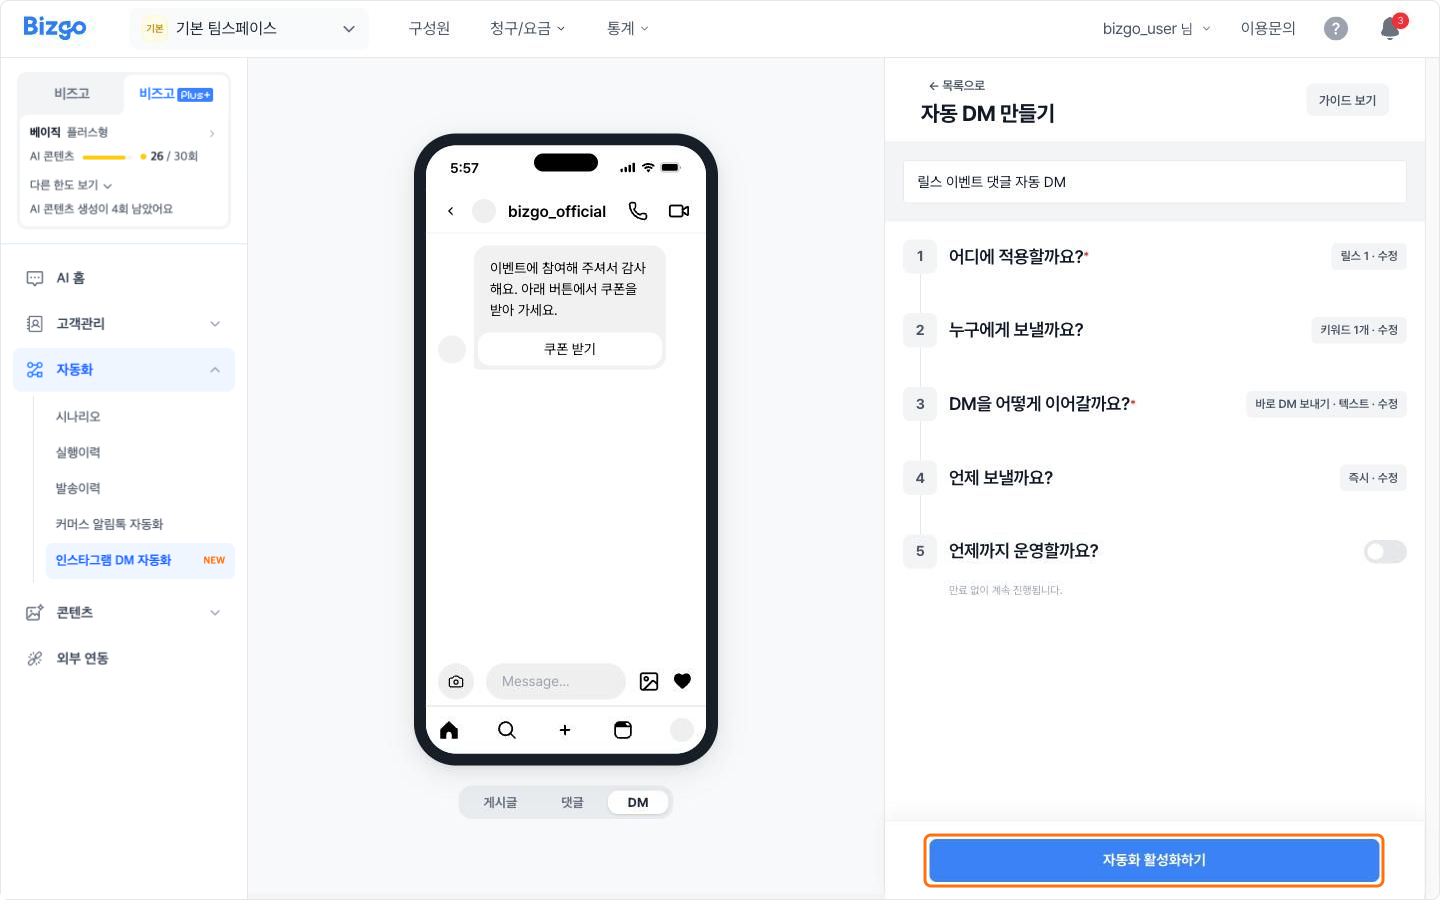
Click Activate automation and the auto-DM saves and switches on at once. Use the switch in the list to stop or restart it.
Managing auto-DMs in the list
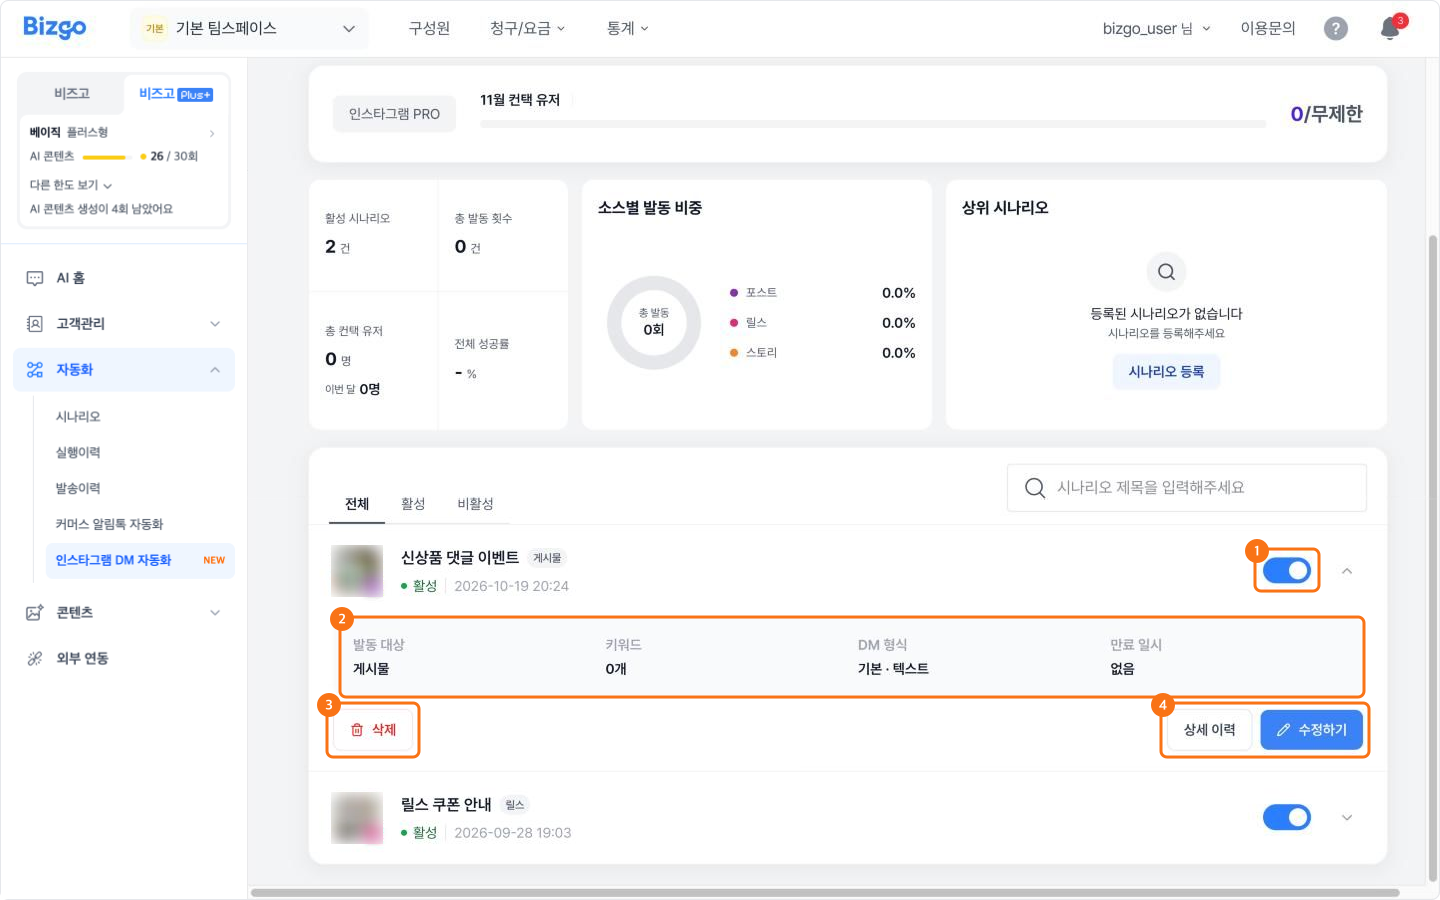
The top of the screen shows the connected account and this month's contacted users, along with active scenarios, total triggers, the overall success rate, and the share of triggers by source. The list below filters by all, active, and inactive, and searches by title.
| Item | Detail |
|---|---|
| On/off switch | Takes effect the moment you click it, with no confirmation |
| Trigger target | A post, a reel, or a story |
| DM format | «Basic» is a direct DM, «Advanced» is a follow-up after a reaction |
| Scheduled / expiry time | The scheduled time for a scheduled send, otherwise the expiry time |
| Detailed history · Edit | Check send results or change the settings. Editing is locked within 10 minutes of a scheduled send |
A deleted auto-DM cannot be recovered
Its automatic replies stop immediately. Disconnecting the Instagram account also stops every auto-DM on that account.
If errors start after changing account details
Changing your Instagram account name or password breaks the connection and can cause errors. Click Reconnect in the «Connect your Instagram account» dialog, or reconnect under External integrations. Reconnecting leaves your existing auto-DMs and saved settings intact.
Next
- Checking results → Check automated send results
- Commerce automation → Automate store Alimtalk